
Restore your Backup
A complete restore needs of course in advance a complete backup of
- NextcloudPi Settings (using
nc-export-ncp) and - Nextcloud Data, User, Files (using
nc-backup- withincludedata = yes)
Restoring NCP Settings
:: Note ::
These are only the Settings of NCP, no users, no apps, only what you have configured in the NCP TUI or WebUI.
- Take care, that your USB-Backupdrive will be mounted automatically. To do that,
1.1 navigate to NCP-TUI or NCP-WebUI
1.2 navigate to section “System”
1.3 Choose “nc-automount” and activate it. - login to your pi via SSH (ssh pi@IP-ADDRESS)
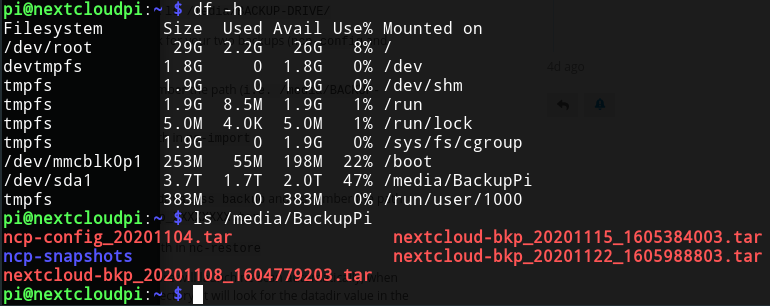
- Type
df -hto list attached drives. - Look for your backup drive and type:
ls /media/BACKUP-DRIVE/
You should see a list of your backups. Look for the config-backup and note its name:ncp-config_XXXXXXXX.tar
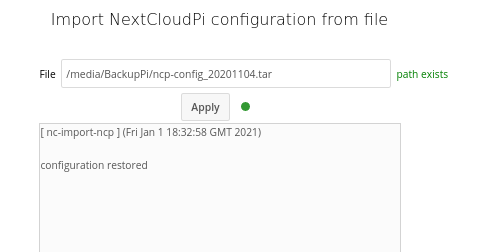
- Finally, do it: Go back to the NextcloudPi TUI or WebUI
5.1 Navigate to section “Backups”
5.2 choose “nc-import-ncp”
5.3 Fill inpath&file nameand hit apply.
This will not take long as it only restores your ncp settings. (You will not have any user or data restored. This we will do in the following step.)
Restoring the Nextcloud data-backup
:: Note ::
o This is your data, users and apps.
o It does not include the NCP configurations.
- Follow step 1-7 from the description above
- Look for the backup file and note its name:
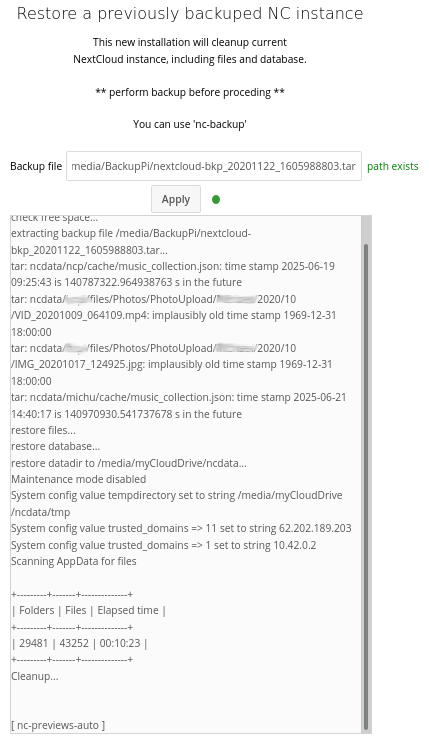
nextcloud-bkp_XXXXXXXX_XXXXXXXXXX.taror - in case of compressed backups - .tar.gz - Go back to the NextcloudPi TUI or WebUI
3.1 Navigate to section “Backups”
3.2 choosenc-restore
3.3 Fill inpath&file nameand hit apply.
Depending on your backup size this can take a very long time. - Once the backup has been restored successfully reboot NCP using the WebUI (top right) or just reboot the pi itself with SSH
sudo reboot now
Now you will be able to login to your Nextcloud with your former login and all your data, apps and users should be restored.
Congratulations, you’re done! ![]()
:: Note ::
The WebUI login will not be restored. you will have to use the password you got when you first activated (NCP activation page)
(the process for restore of dateless backups (includedata = no) is the same - however dateless restore will need further steps to take care of the datadir. This can be done e.g. by using BTRFS and nc-restore-snapshot as described here.
Restoring compressed backups (.tar.gz)
nc-backup can create compressed backups to save diskspace (.tar.gz instead of .tar only). On the other hand, this has a small disadvantage when it comes to restoring:
The decompression of the .tar.gz - file is done in the disk that contains the backup.
You might run into “disk full” error-messages because of that.
Possible workarounds:
- move your .tar.gz-file to a bigger disk

- decompress manually (and choose different disks)
Restoring across Nextcloud-Versions
nc-restore will restore Nextcloud to the version installed when creating the backup.
In few situations this might cause trouble: E.g. if your NextcloudPi-Version already is setup for Nextcloud 24 and PHP 8.1, but you are trying to restore a much older Nextcloud-Version (e.g. Nextcloud 22), which isn’t compatible to this PHP-Version yet.
Recommendation: Try to keep your backup/restore version close. In worst case you might have to setup your new instance with an old version like described here
Restore of huge backups
A restore of a huge backup will take time. Of course this depends on your hardware, compression yes/no - but as an example it’s been reported that a restore of 400GB took more than 24 hours.
Recommendation: If you aren’t physically in front of your NextcloudPi instance (via keyboard/display) and using SSH or WebUI instead, take care of a stable network connection and try to avoid powersaving-mode or similar.
Restore to new instance plus change of datadir in parallel
This is not supported. The restore will use the datadir-path, that’s been used when the backup has been created.
If your datadir has been e.g. /media/usbdrive during your backup, this path will be used also for the restore. You cannot restore to /media/newusbdrive!
We hope this doc was helpful, if you encounter any issues please reach out to the community.
These docs are written by volunteers, please consider becoming one of them.
Contact the wiki team at Matrix or Telegram