Warning, use this “How to” with caution and at your own risk, it’s a work in progress.
Latest Update 24.01.2023
- This should, be a beginner-friendly tutorial on how to get NCP running on Proxmox.
- Please give feedback if you have issues.
- Thanks in advance for any help & contributions.
The goal
-
Running NCP on a Proxmox server (obviously)
There are 5 ways of achieving this:
1.1 Use the official LXC/LXD NCP image in a CT


1.2 Use the officialcurlinstaller script in a Debian 11 VM (recommended)
1.3 Use the official ncp-VM image DISCONTINUED
1.4 Use the official NCP Docker image in a CT or VM
1.5 Use the Unofficial Proxmox Helper Script in a CT 
-
Pass through a drive that is used for NCP data only.
-
Restore NCP Backup from external USB Drive
1. Running NCP on a Proxmox
Option 1: Official LXC/LXD NCP image in a CT
This option, together with option 4 and 5 seem to be the most resource friendly option.
As of 1. October 2021 @nachoparker added LXD support. which is great news, as this will be a NCP with all the functionality, as opposed to the docker image that misses some features.
However, things are more complicated than they seem. To my knowledge, there is no streight forward way to install it in a Proxmox CT (October 2022).
Please head over to this post if you want to make it happen.
Option 2: Official Curl Installer in Debian 11 VM (Recomennded)
Works well and easy. However, the drawback here is, that this is not a BTRFS file system that would allow nc-snapshots (except if you do are doing some manual partitioning or add a separate drive with BTRFS)
See Official NCP Documentation for the more polished and up-to-date guide of this option.
- Download debian-11.X.X-amd64-netinst.iso
- upload the debian .iso to your Proxmox Server
- Set up the Debian VM in Proxmox and give it the resources you wish. (min 2GB of RAM but ideally much more. If you want to use a separate physical drive for data (see section 2. below), you don’t need more than 4-8GB of disk space, if not, just give it as much as you need for your data.)
- Boot into the VM and use the Proxmox shell of the VM to go thorough the installation process.
- After the initial installation, ssh as
rootinto the VM (you might need to enableroot loginfrom the Proxmox shell before you can use ssh (here is how). Alternatively, just use the Proxmox shell for the steps below (note: copy and paste does not work in the virtual VM shell) - Install updates:
apt updates && apt upgrade -y - Install curl:
apt install curl - Install NCP as root by running:
curl -sSL https://raw.githubusercontent.com/nextcloud/nextcloudpi/master/install.sh | bash - Access & Activate NCP using the VM’s IP from your browser
Option 3: Official VM image
Using the VM image from NCP was the easiest and most straightforward option.
However, currently the NCP project does not offer a VM image.
![]() Therefore this option is currently not possible.
Therefore this option is currently not possible.
I don’t want to delete the section just yet in case a VM image in provided in the future.
Please check the NCP Release Page on GitHub to see if one is available.
- Create a new VM on your Proxmox server and chose the option “Do not use any media” in the OS section.

-
In the main Proxmox terminal
-
Change directory:
cd /var/lib/vz/images/ -
Use the
wgetcommand to download the latest VM image from the NCP Project on GitHub:
wget https://FULL-URL-TO-THE-VM-IMAGE-ON-GITHUB -
When finish, use the
tar -xfcommand to extract the download.
Currently, (April 2021):
tar -xf NextCloudPi_VM_XX-XX-XX.tar.bz2 -
Finally create a VM disk using
qm importdisk VIRTUAL-MACHINE-NUMBER NextCloudPi_VM_XX-XX-XX.img DRIVE-NAME
(Example:qm importdisk 104 NextCloudPi_VM_11-30-20.img local-zfs)
-
-
Close the terminal and in the Proxmox Web interface:
-
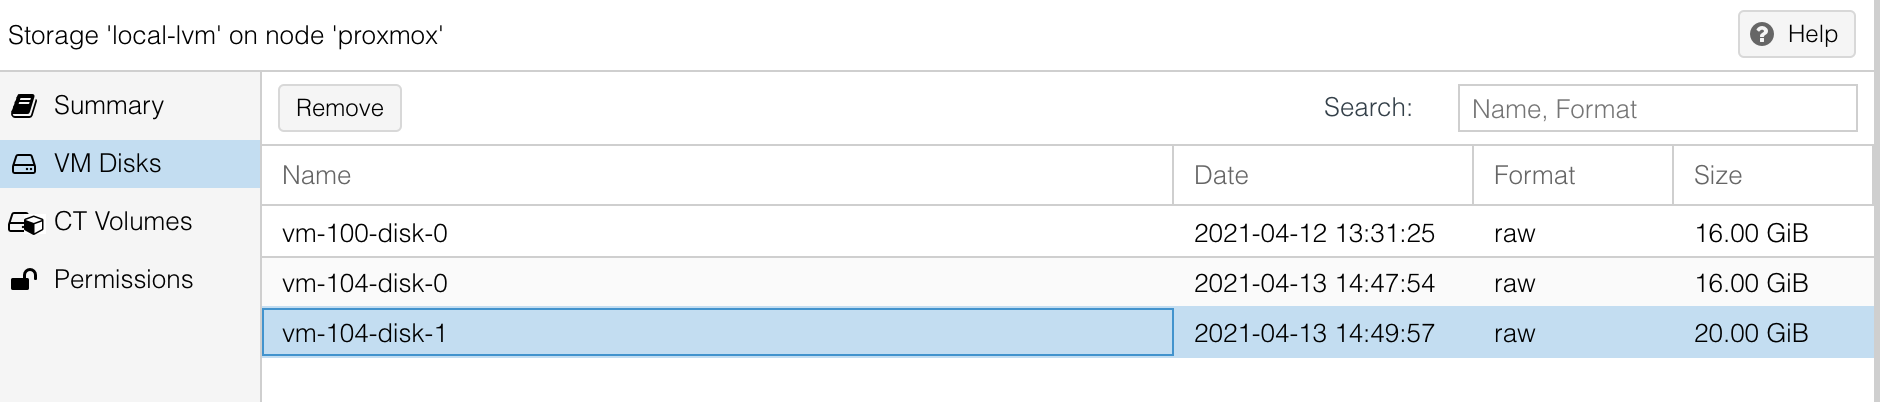
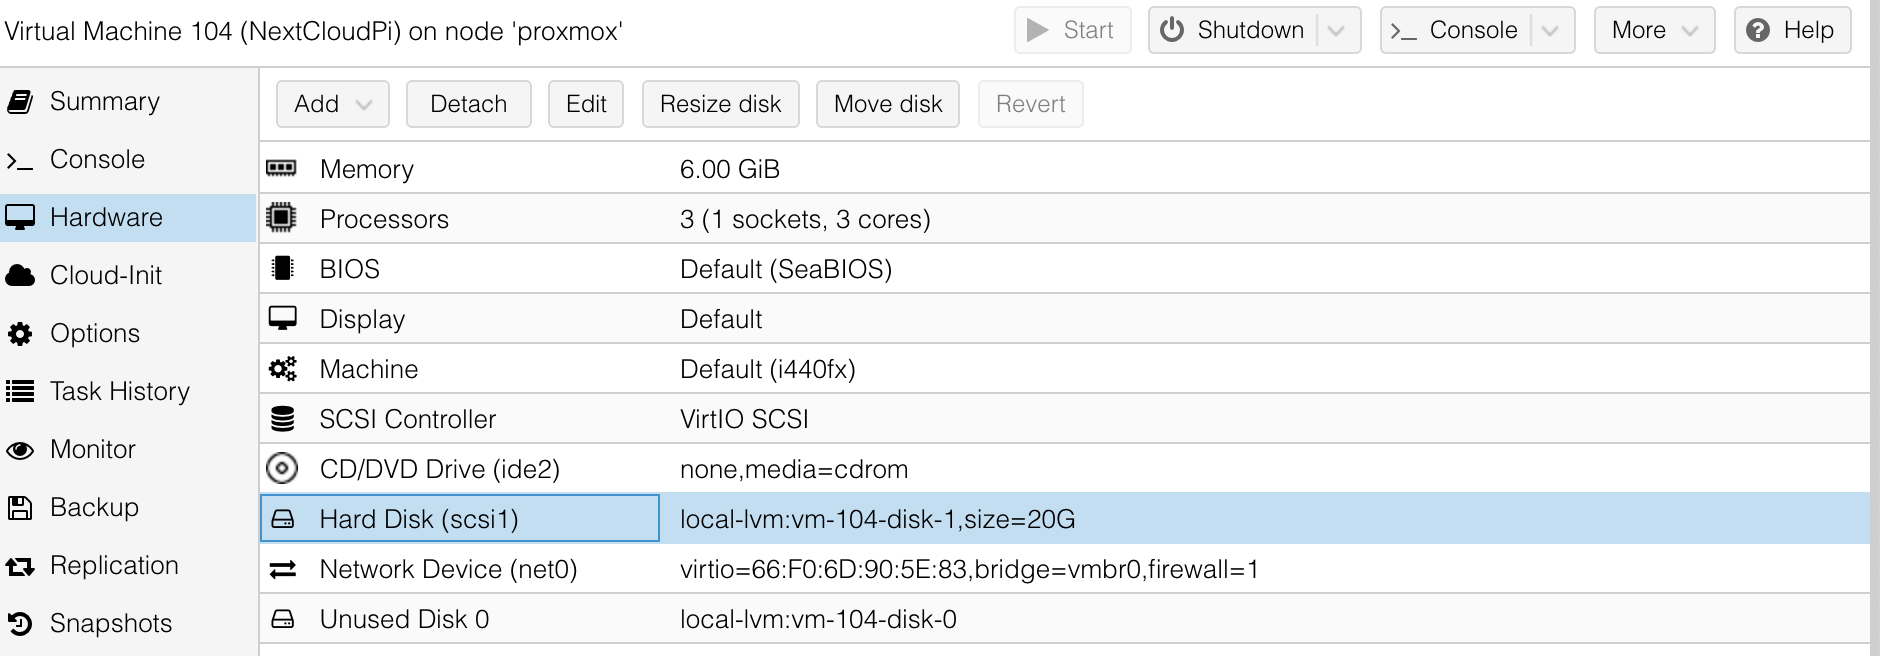
Go to your VM you wish to use and select
Hardware -
Find the disk you have just created (usually
disk-1) -
Use the
Editfunction to add it to your VM
-
On the left go to
Optionand set boot to the new disk
-
Start the VM and run updates.
-
-
Access & Activate NCP using the browser

(2021) The default user and password of your VM will be:
user: root
password: ownyourbits or vagrant
Option 4: Official Docker image in a CT or VM
Together with option 1 this is resource-friendly (if you use a CT). However, you will miss some features and Proxmox does not recommend running Docker in CTs but only in VMs.
The installation is, for people used to docker, just like any other docker image there is even a comprehensive guide in the NCP documentation. But I did not have time to work on this Proxmox specific guide, but you can use the official Docker Documentation to install Docker in a CT or VM and then use the NCP Documentation mentioned above to get the NCP Container up and running,
If you like to write a specific tutorial, you are welcome to contribute!
Option 5: Unofficial Proxmox Helper Script
A project, that is not part of the NCP Project Proxmox Helper Scripts Offers one line scripts to install all kinds of software in CTs.
The script works (as attested here) however, you should check what the script does and not blindly trust it. (If you don’t know how to check the script and feel overwhelmed by such a task, the Video from DT might help to remove some of the anxiaty ![]()
- Simply use the Proxmox Shell to run the following script:
bash -c "$(wget -qLO - https://github.com/tteck/Proxmox/raw/main/ct/nextcloudpi-v4.sh)"this will create a CT with NCP installed. - Use your browser to access and activate your NCP installation.
If you are migrating from a RaspberryPi to a Proxmox CT @johndoe0815 wrote a guide on this
2. Pass through a drive that is used for NCP data to a VM.
In this case, we are going to pass through an entire, physical drive to a VM.
(If you wish to only pass through only part of a drive, as virtual drive commands will be slightly different. Check out this and the official Proxmox docs
If you wish to pass through a drive to a CT the process might be very different. Maybe here you can get help on that?)
How to
-
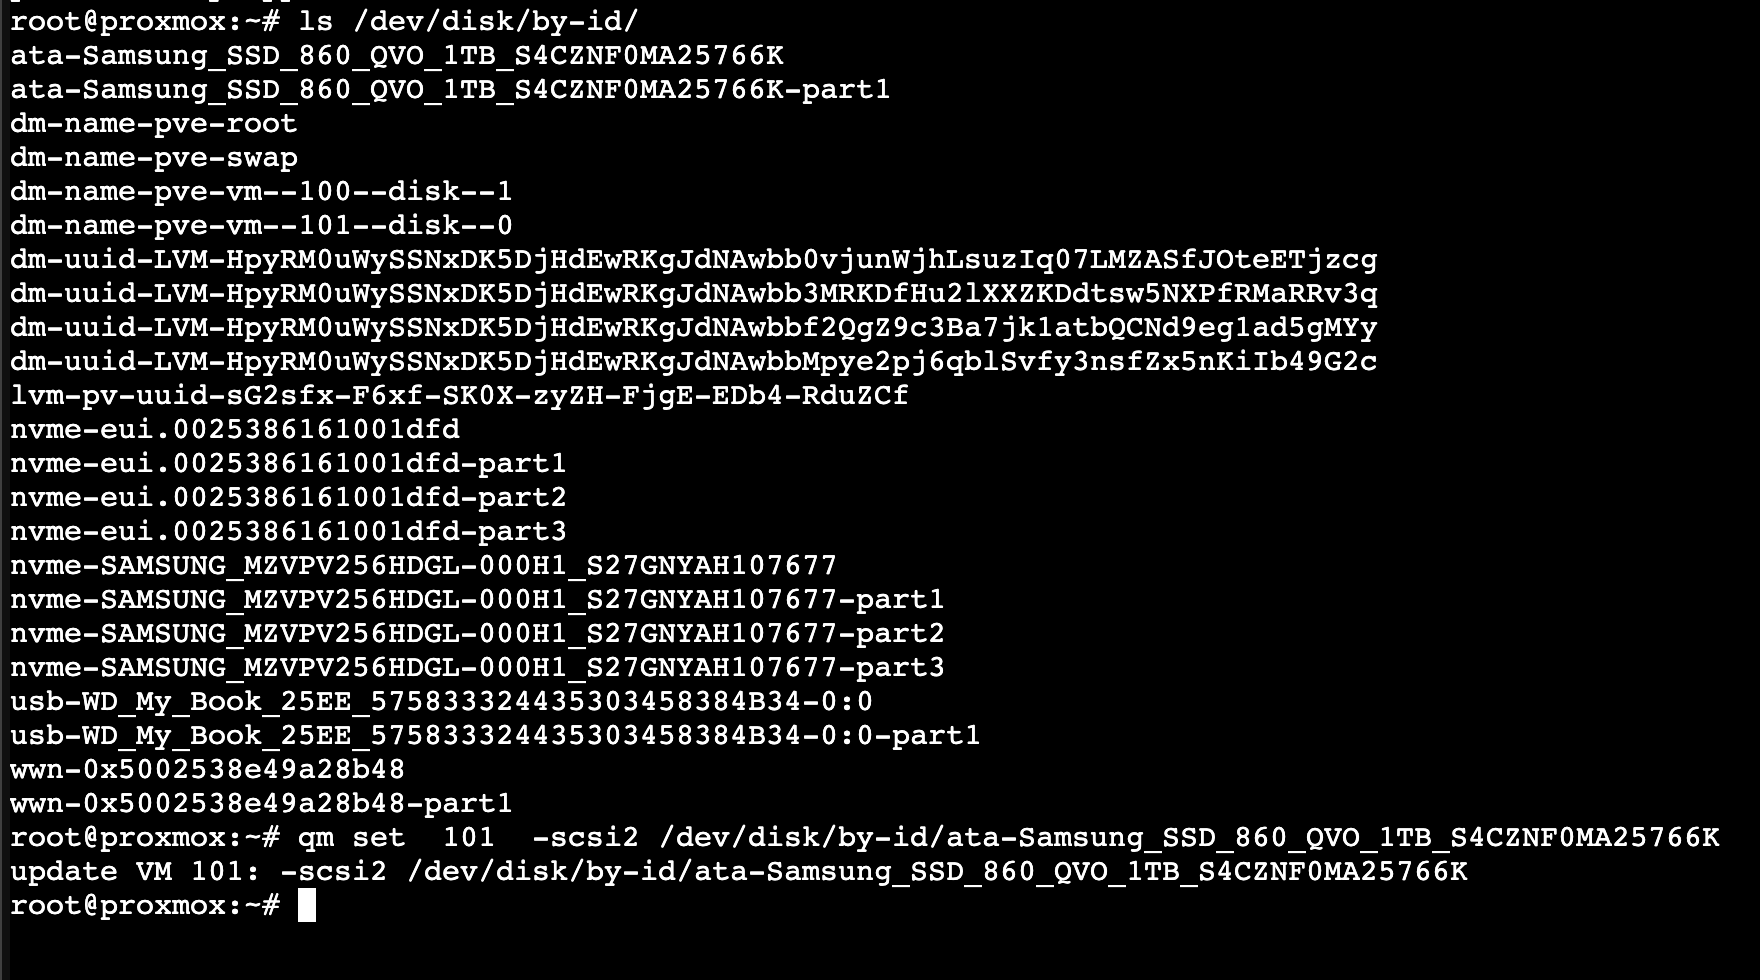
Use the main Proxmox Terminal and type:
ls /dev/disk/by-id/a list of all your drives, physical and virtual will appear. -
Find the drive you wish to pass through to your VM and copy the full drive name.
-
Use this command to add it:
qm set VM-ID-NUMBER -scsi2 /dev/disk/by-id/FULL-DRIVE-NAME -
Leave the Terminal and navigate to your VM
-
In the
Hardwaresection you should now see the drive. -
Boot your VM and open it’s Terminal.
-
With the
lsblkcommand you should see your drive listed.NOTE: If you are coming from e.g. a RaspberryPi setup and want to use the data drive do not follow the steps below. Simply let your NCP VM instance know where your data directory is & restore your NCP by loading a data-less backup. (How to restore backups)
-
Delete all data on the drive you want to use as data drive.
(
sdaas example!)- Type
fdisk -c /dev/sda(This will delete all data onsda - Type
gto create agptpartition table - Type
nto create a new partion, just hit enter to all (defaults to Linux and max size) - Type
wto save and exit - Run
mkfs.ext4 /dev/sda1(alternatively you can format as btrfs)
- Type
-
Create a mountpoint, mount it and set auto-mount
- Type
mkdir /media/MY-MOUNT-NAMEcreate mountpoint - Type
mount /dev/sda1 /media/MY-MOUNT-NAMEmount drive to system - Type
df -hTto see if it is mounted (if it is listed, it’s mounted) - Type
nano /etc/fstaband add the following line:
/dev/sda1 /media/ncdata ext4 4,nofail 0 0(if you use BTRFS please see here how to mount and edit fstab)
- Type

3. Restore NCP Backup from external USB Drive
(This section needs some love (work), but here is a summary:)
How to
Attach your Backup drive to your Proxmox host and pass it through to your NCP VM.
In the NCP VM mount it, and restore the backup: How to restore NextcloudPi Backup .
Credit to @OliverV
for helping out.
Credit to @johndoe0815
for pointing out about the PVE Helper Script