Install nextcloud on Synology NAS
This installation instruction is inspired bij the ober from Stephan182730 but I got a problem reaching collabora and my backup would not work.
After a lot of research I finally found a way to install nextcloud on a synology NAS that works. I made some new pictures of the reverse proxy, because in Stephans pictures the were some errors.
1. Make a wildcard certificate
Follow these instructions: Synology: How to Add Wildcard Certificate – Marius Hosting
2. Install Container Manager (docker)
Go to Package Center and look for Container Manager and install it.
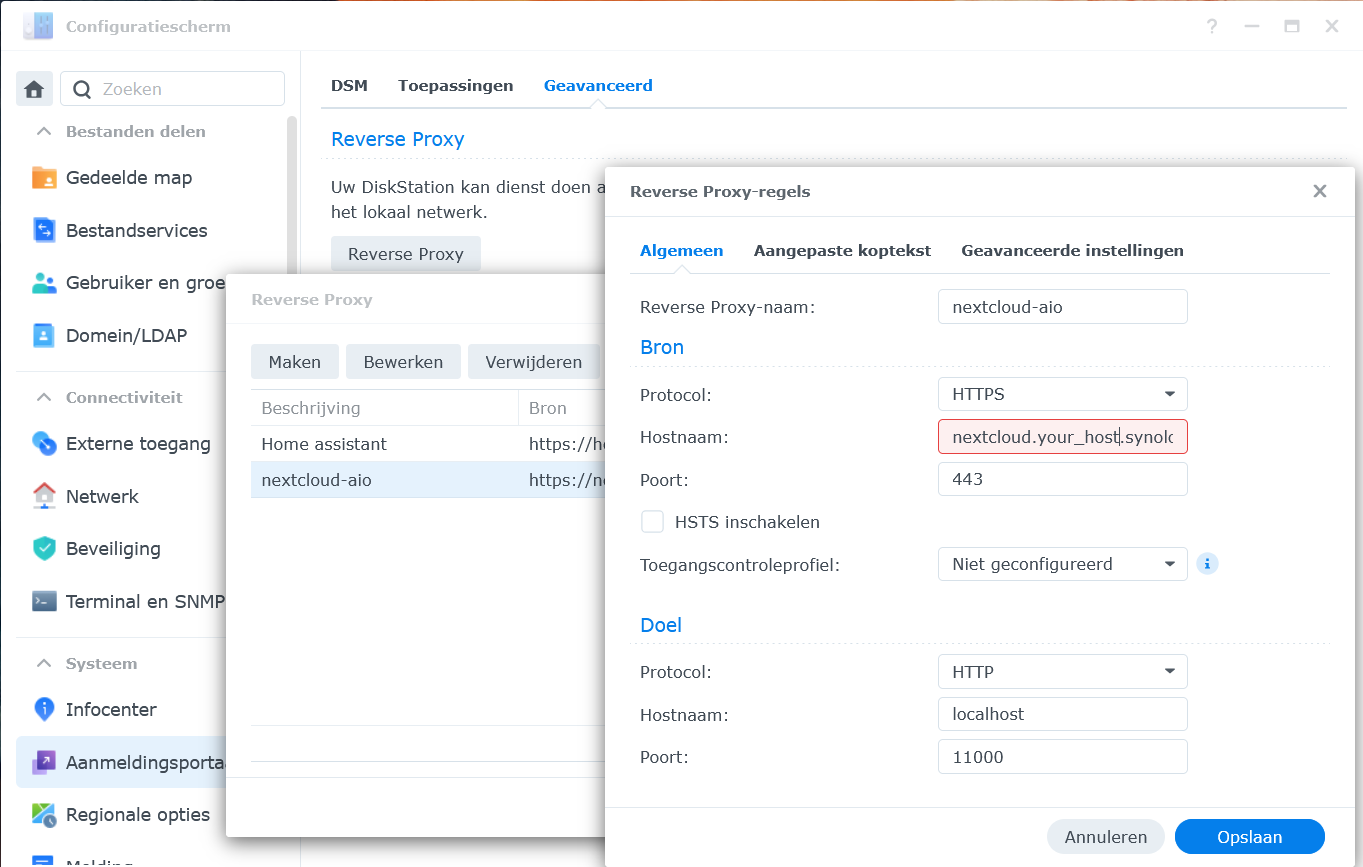
3. Create a reverse proxy
Go to the control panel, login portal. Click on Advanced->Reverse Proxy and create a new reverse proxy configuration. Enter the details from the window below. Use your domain name as hostname plus something like nextcloud before that (nextcloud.yourname.synology.me). For the hostname at the bottom, use localhost or the IP address of your Synology NAS.

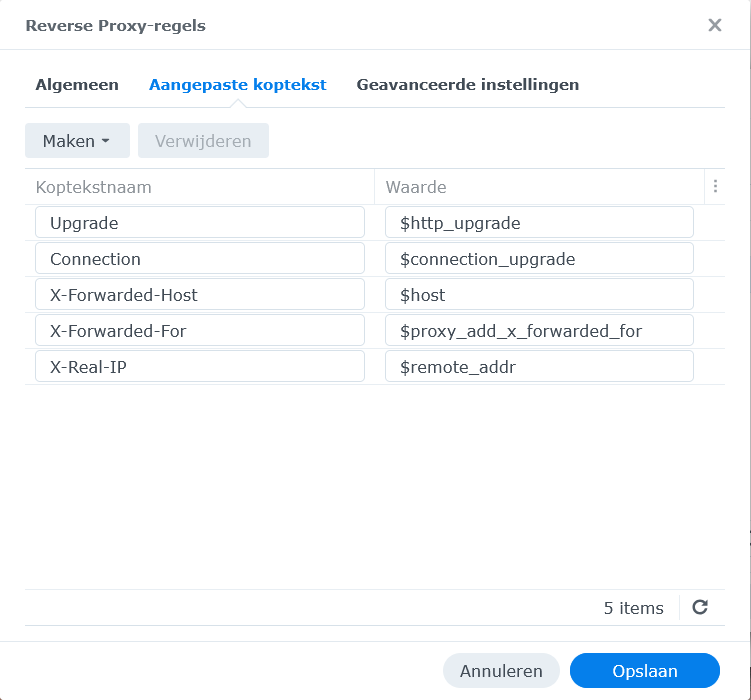
Go to custom header tab and first chose ‘WebSocket’ under Make. Then add the next three lines with Make.

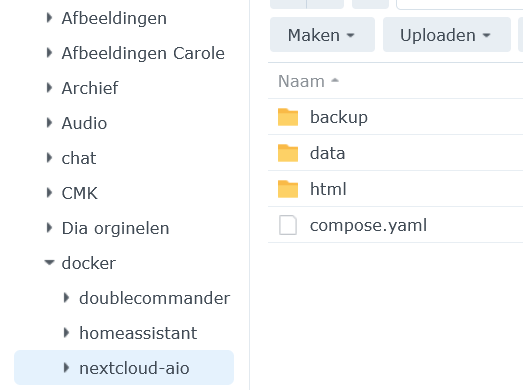
3. Make the following maps in your NAS under docker:

Under backup, make also a map called ‘borg’
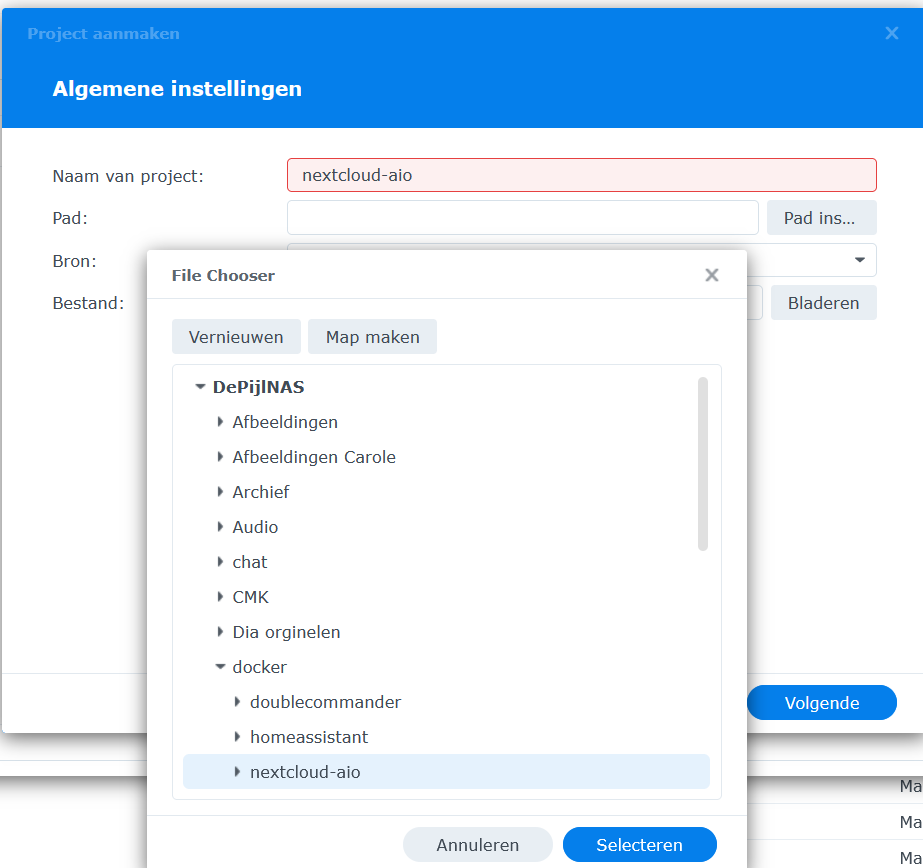
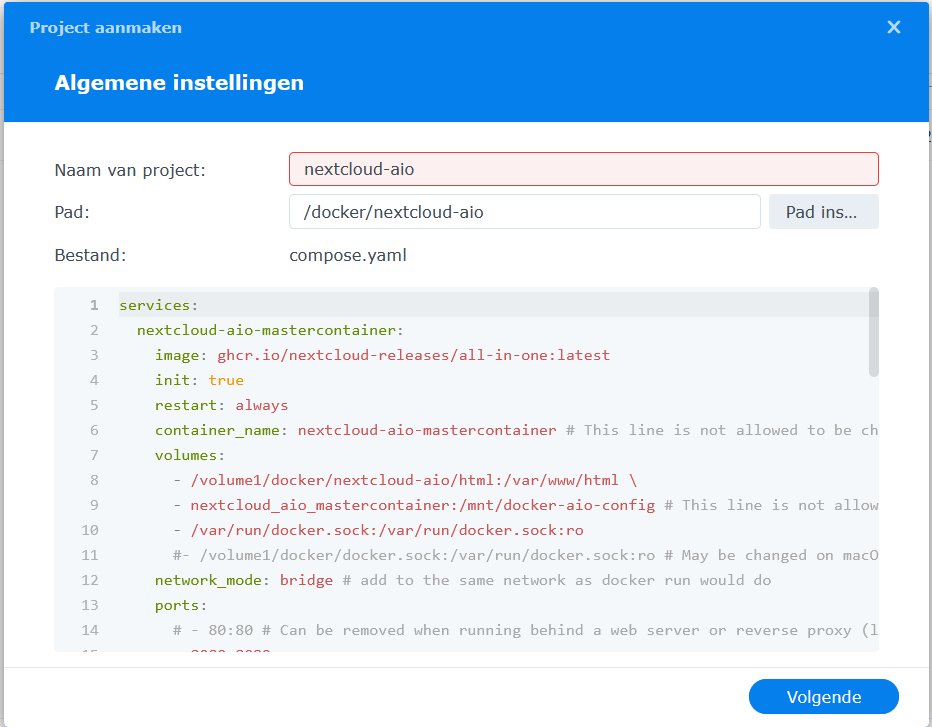
4. Go to Container Manager and chose Project
Make a project called nextcloud-aio and insert the path to ‘nextcloud-aio’ in docker.
Next add this compose.yaml file. Then execute the project.
Wait until the nextcloud-aio mastercontainer is made.
5. Adjust the firewall following these instructions:
https://help.nextcloud.com/t/nextcloud-aio-installation-guide-for-synology-nas/188702
6. Go to your NAS adress in your browser on port 8080
In my case: 192.168.178.64:8080
Ignore the warnings and proceed to this page. You will first see a page with a passphrase. Copy that. If you proceed you have to enter that in a field.
In the backup field enter the map: /volume1/docker/nextcloud-aio/backup
After choosing all the options start the containers.
You will have to wait some time before all dots are green.
7. The you can enter your nextcloud with the adress you entered in the reverse proxy.Support intro
Sorry to hear you’re facing problems. 
The community help forum (help.nextcloud.com) is for home and non-enterprise users. Support is provided by other community members on a best effort / “as available” basis. All of those responding are volunteering their time to help you.
If you’re using Nextcloud in a business/critical setting, paid and SLA-based support services can be accessed via portal.nextcloud.com where Nextcloud engineers can help ensure your business keeps running smoothly.
Getting help
In order to help you as efficiently (and quickly!) as possible, please fill in as much of the below requested information as you can.
Before clicking submit: Please check if your query is already addressed via the following resources:
- Official documentation (searchable and regularly updated)
- How to topics and FAQs
- Forum search
(Utilizing these existing resources is typically faster. It also helps reduce the load on our generous volunteers while elevating the signal to noise ratio of the forums otherwise arising from the same queries being posted repeatedly).
This installation instruction is inspired bij an other one from Stephan182730 but I got a problem reaching collabora and my backup would not work.
After a lot of research I finally found a way to install nextcloud on a synology NAS that works. I had to disable seccomp for my NAS and activated the corresponding rule in the yaml file.
I made some new pictures of the reverse proxy, because in Stephans pictures the were some errors.
1. Make a wildcard certificate
Follow these instructions: Synology: How to Add Wildcard Certificate – Marius Hosting
2. Install Container Manager (docker)
Go to Package Center and look for Container Manager and install it.
3. Create a reverse proxy
Go to the control panel, login portal. Click on Advanced->Reverse Proxy and create a new reverse proxy configuration. Enter the details from the window below. Use your domain name as hostname plus something like nextcloud before that (nextcloud.yourname.synology.me). For the hostname at the bottom, use localhost or the IP address of your Synology NAS.
Go to custom header tab and first chose ‘WebSocket’ under Make. Then add the next three lines with Make.
3. Make the following maps in your NAS under docker:
Under backup, make also a map called ‘borg’
4. Go to Container Manager and chose Project
Make a project called nextcloud-aio and insert the path to ‘nextcloud-aio’ in docker.
Next add this compose.yaml file. Then execute the project.
Wait until the nextcloud-aio mastercontainer is made.
5. Adjust the firewall following these instructions:
https://help.nextcloud.com/t/nextcloud-aio-installation-guide-for-synology-nas/188702
6. Go to your NAS adress in your browser on port 8080
In my case: 192.168.178.64:8080
Ignore the warnings and proceed to this page. You will first see a page with a passphrase. Copy that. If you proceed you have to enter that in a field.
In the backup field enter the map: /volume1/docker/nextcloud-aio/backup
After choosing all the options start the containers.
You will have to wait some time before all dots are green.