Since I had some issues getting this to work and resources on the web are thin when it comes to the AIO docker container, I thought I would share some insides. You must have the container manager installed and some decent knowledge about using docker containers and networks settings.
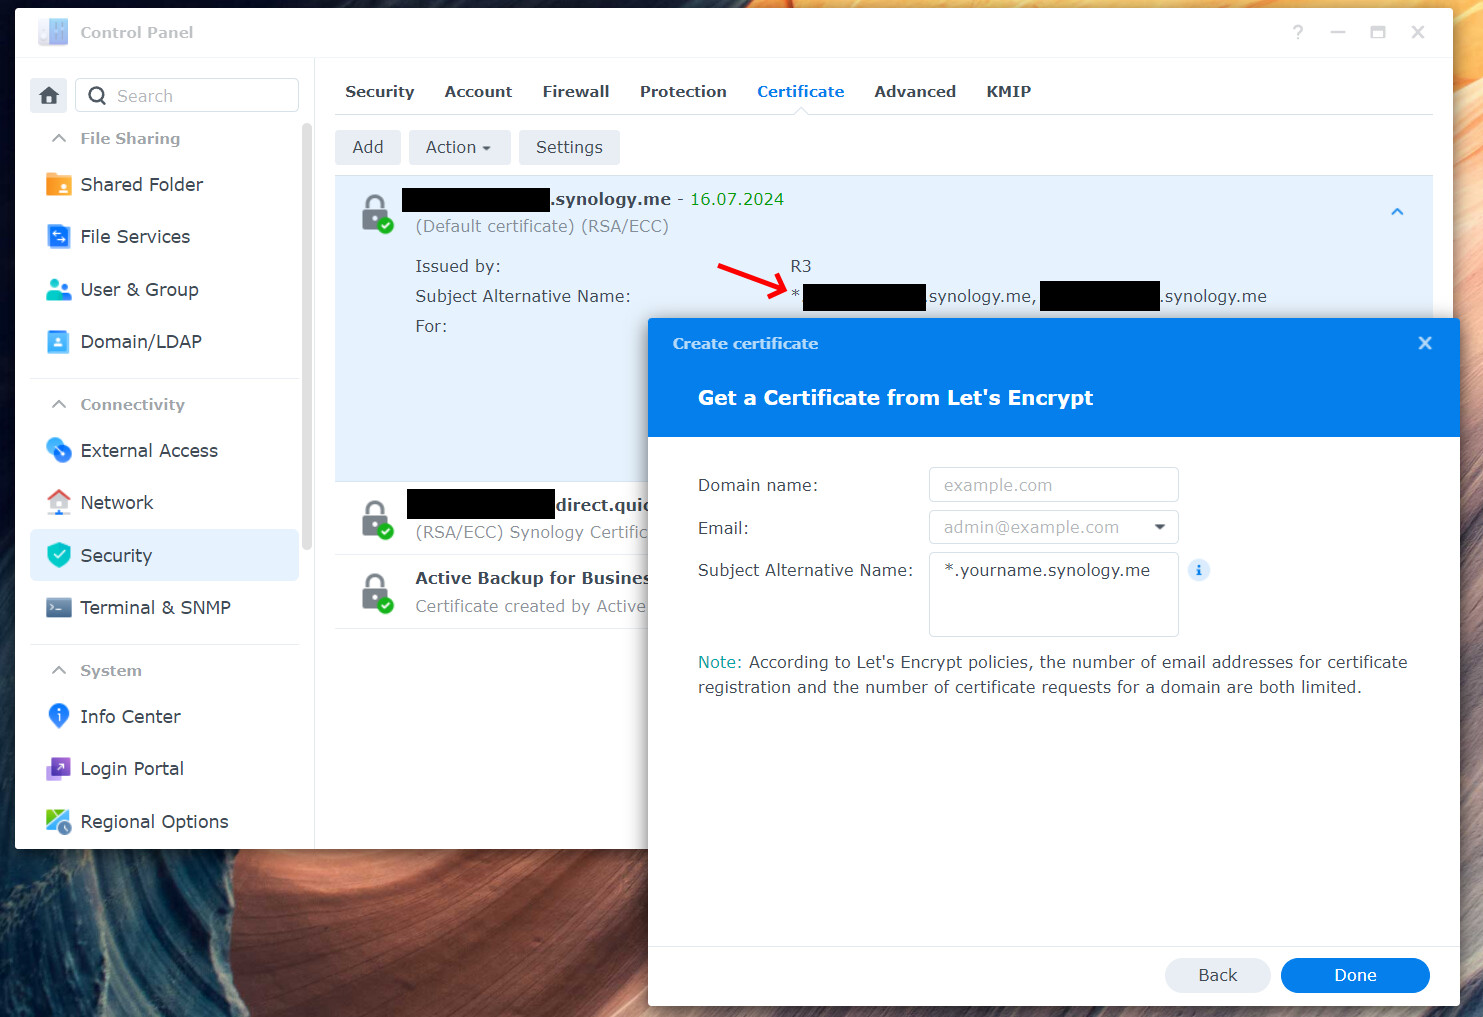
- Make sure you have a wildcard certificate.
Go to Security->Certificates and make sure your certificate is a wildcard certificate, it should have a “*” at the beginning of your domain name. If this is not the case, recreate the certificate and enter *.yourname.synology.me in the alternative name field.
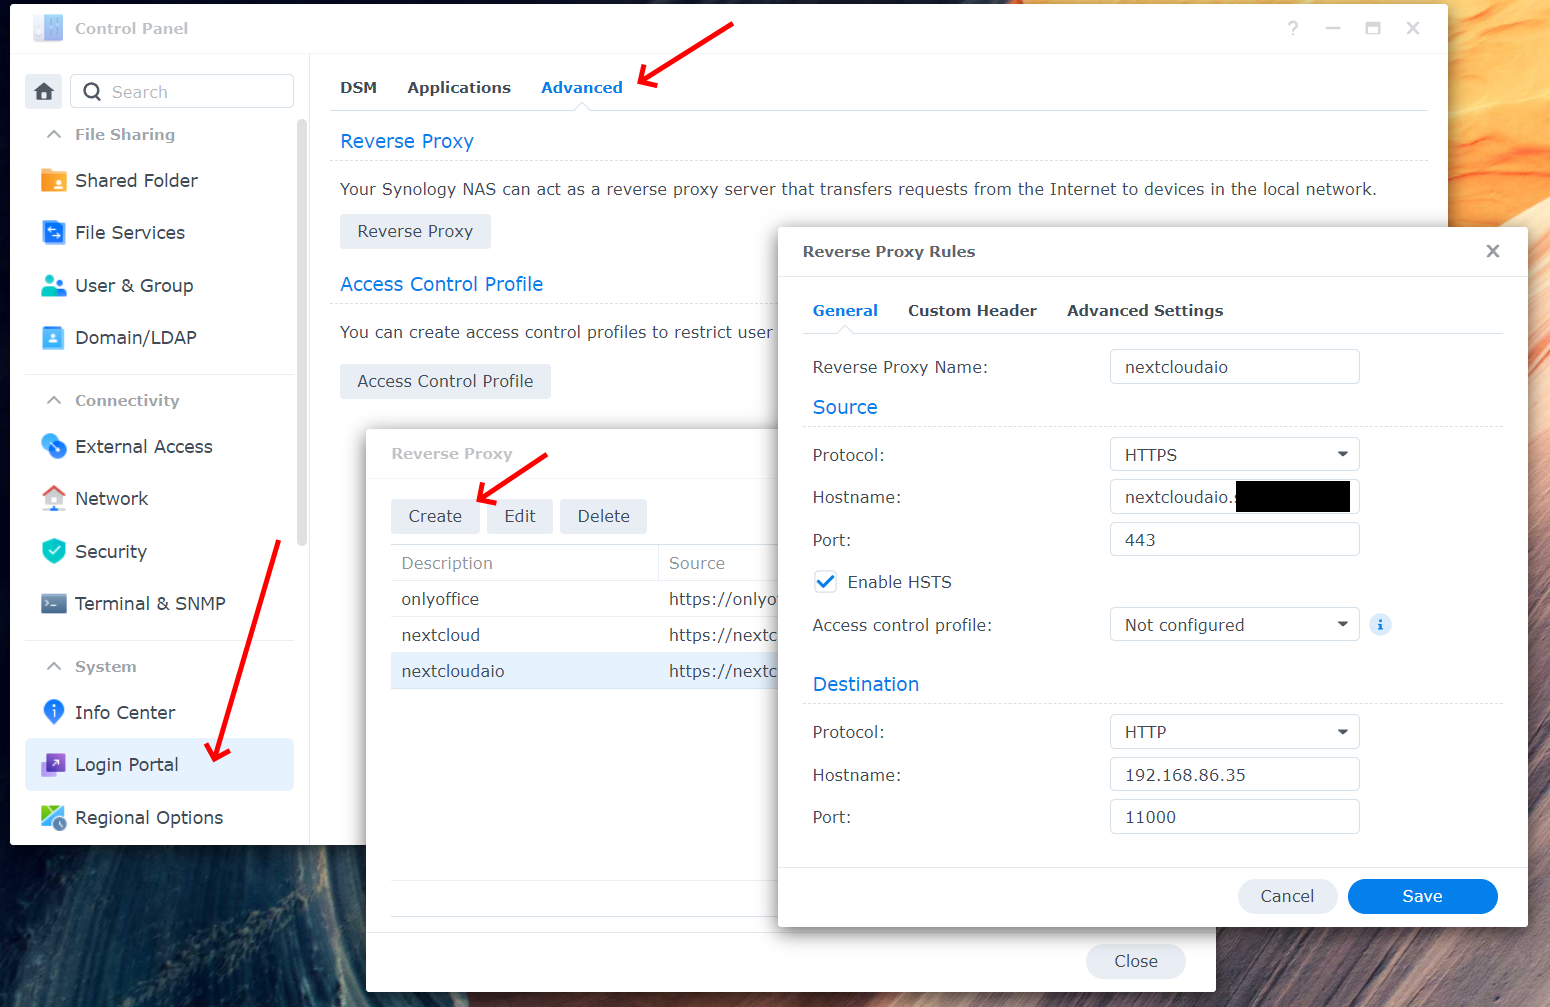
- Create reverse proxy configuration
Go to the control panel, login portal. Click on Advanced->Reverse Proxy and create a new reverse proxy configuration. Enter the details from the window below. Use your domain name as hostname plus something like nextcloudaio before that (nextcloudaio.yourname.synology.me). For the hostname at the bottom, use localhost or the IP address of your Synology NAS.
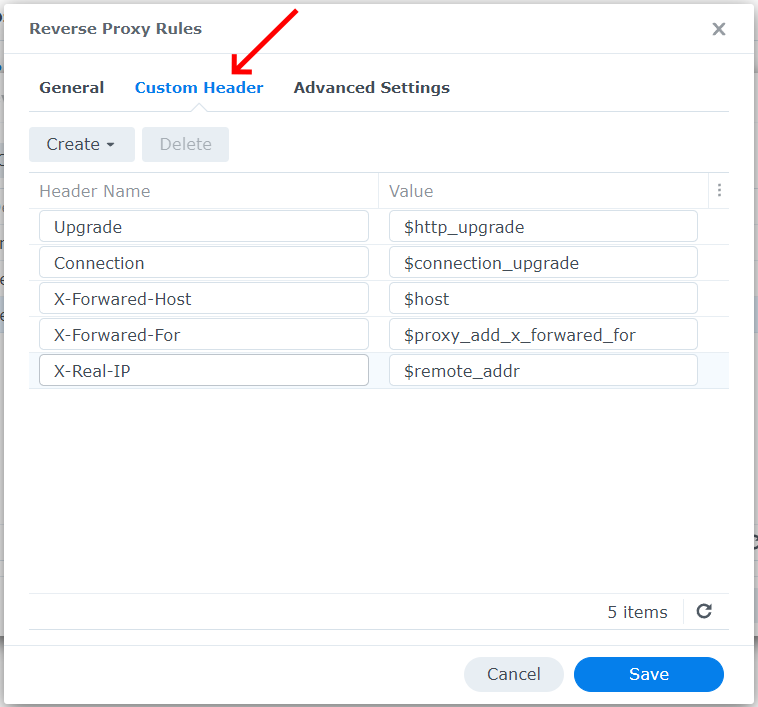
Click on Custom Header and enter the data from the image. Click on save to finish.
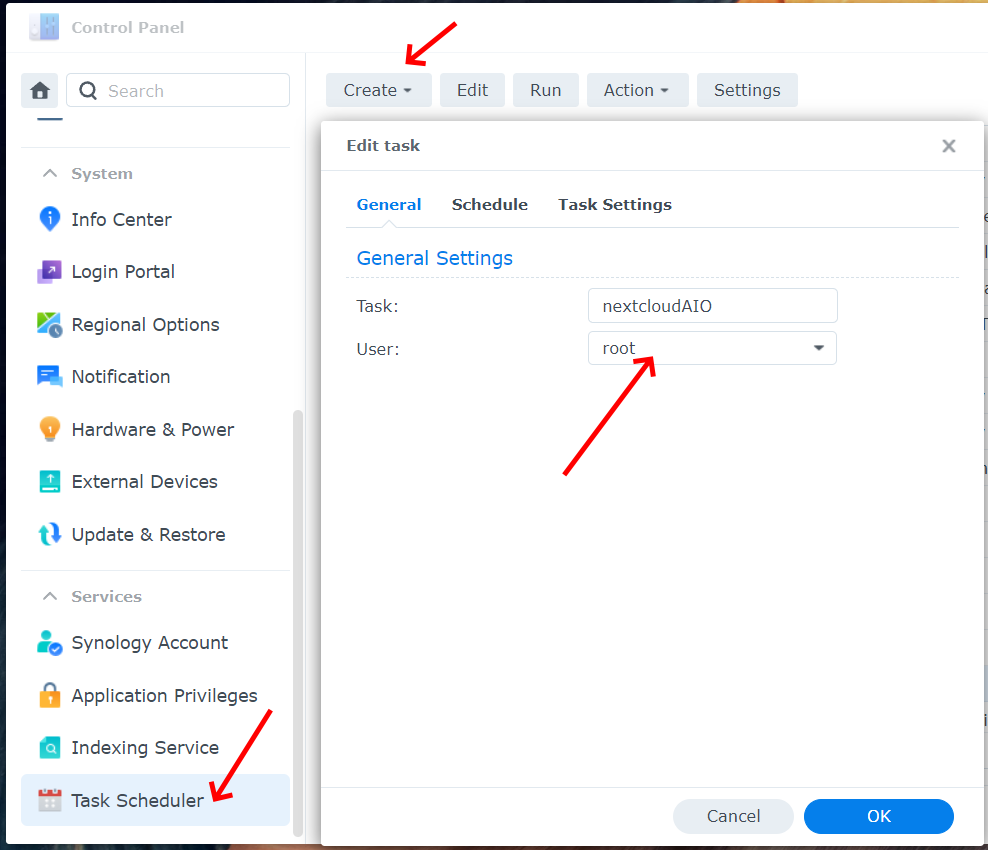
- Create a task to create the docker
Go to task scheduler and create a new task using a scheduled task with user defined script. Set the user to “root”.
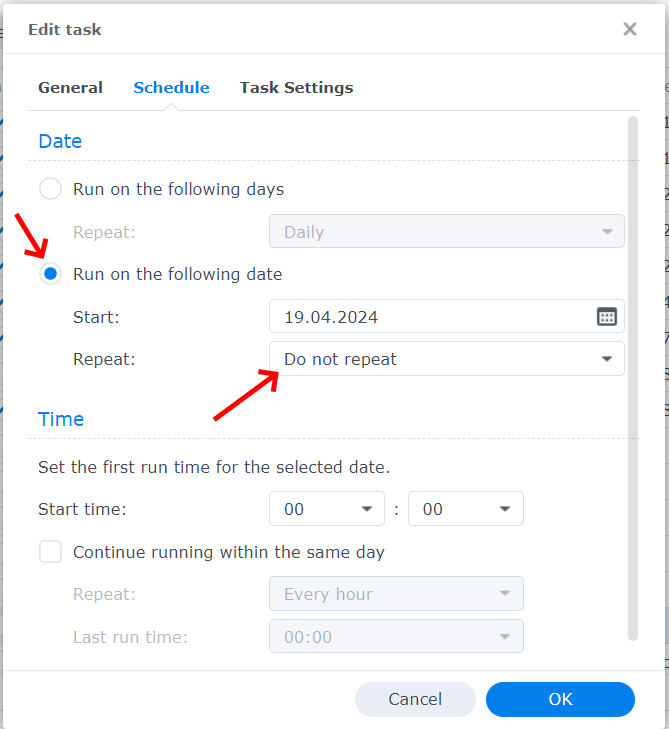
Go to schedule and change Repeat to “Do not repeat”
Go to task settings and paste the code below into the script window. You can enter an email address to get the result from the script, but it’s not mandatory.
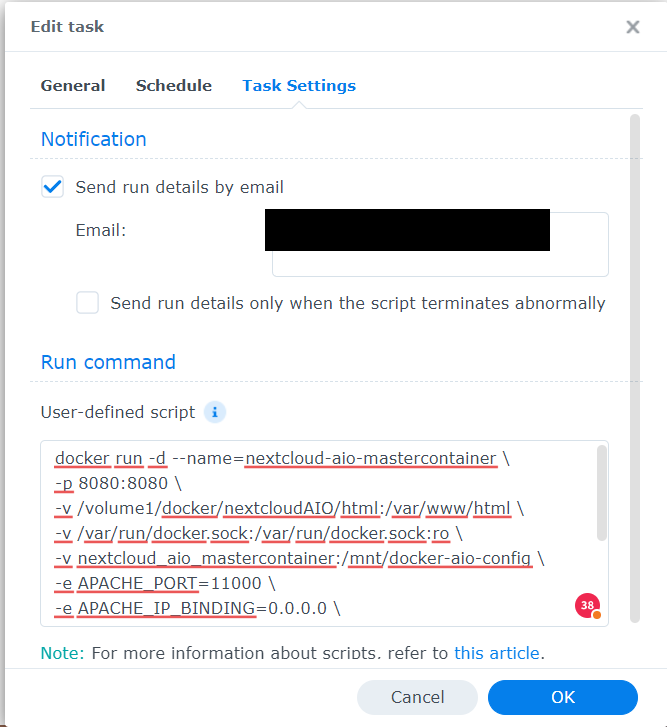
docker run -d --name=nextcloud-aio-mastercontainer \
-p 8080:8080 \
-v /volume1/docker/nextcloudAIO/html:/var/www/html \
-v /var/run/docker.sock:/var/run/docker.sock:ro \
-v nextcloud_aio_mastercontainer:/mnt/docker-aio-config \
-e APACHE_PORT=11000 \
-e APACHE_IP_BINDING=0.0.0.0 \
-e NEXTCLOUD_UPLOAD_LIMIT=10G \
-e NEXTCLOUD_MEMORY_LIMIT=4096M \
--restart always \
--init \
--sig-proxy=false \
nextcloud/all-in-one
Click OK to close the window. You most likely have to enter your credentials to finish the task. Uncheck the repeat check box.
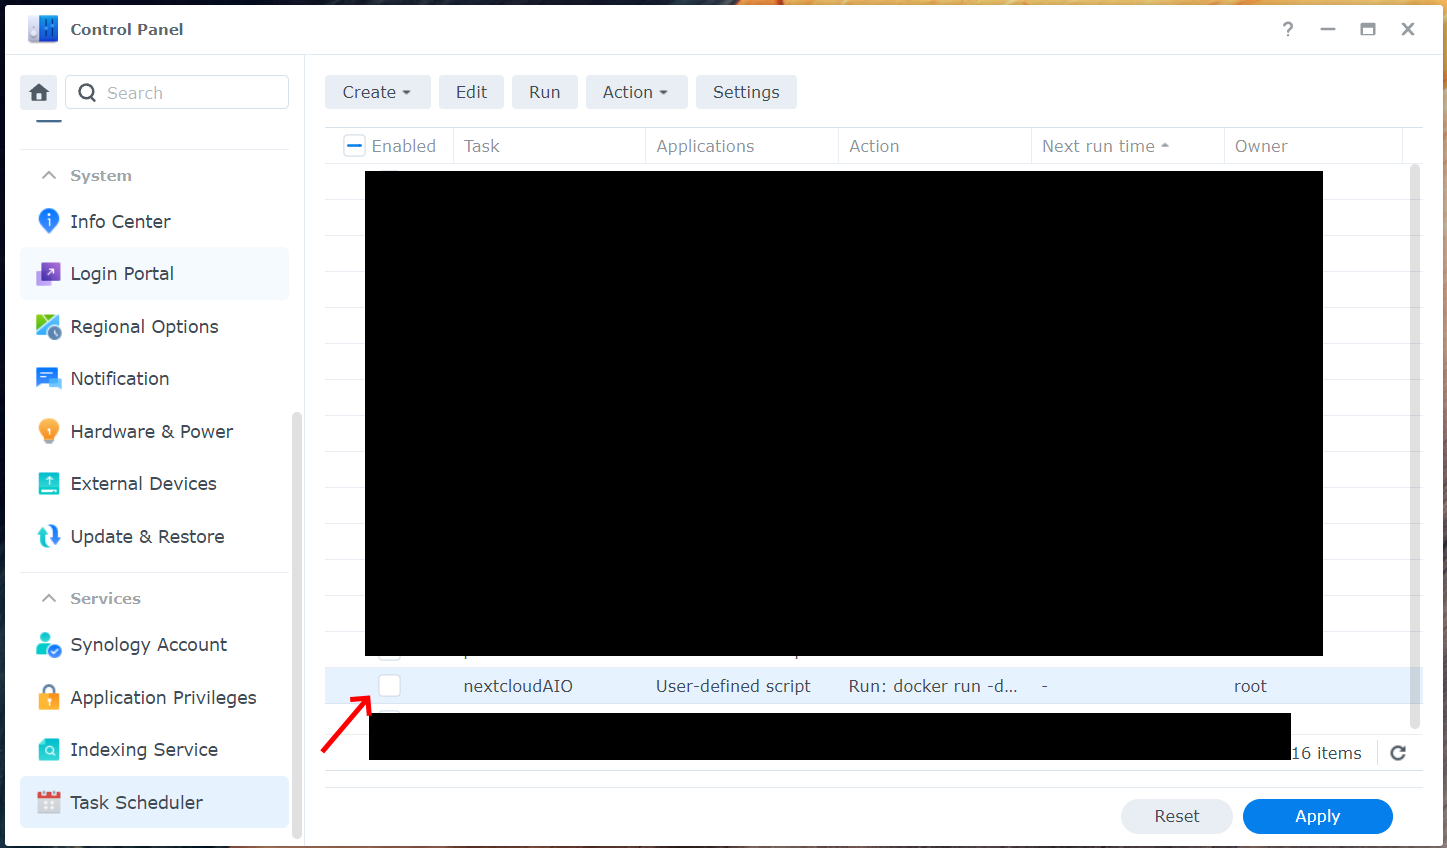
Right-click on the task and execute it. Go to the container manager. You should have a new container called “nextcloud-aio-mastercontainer”.
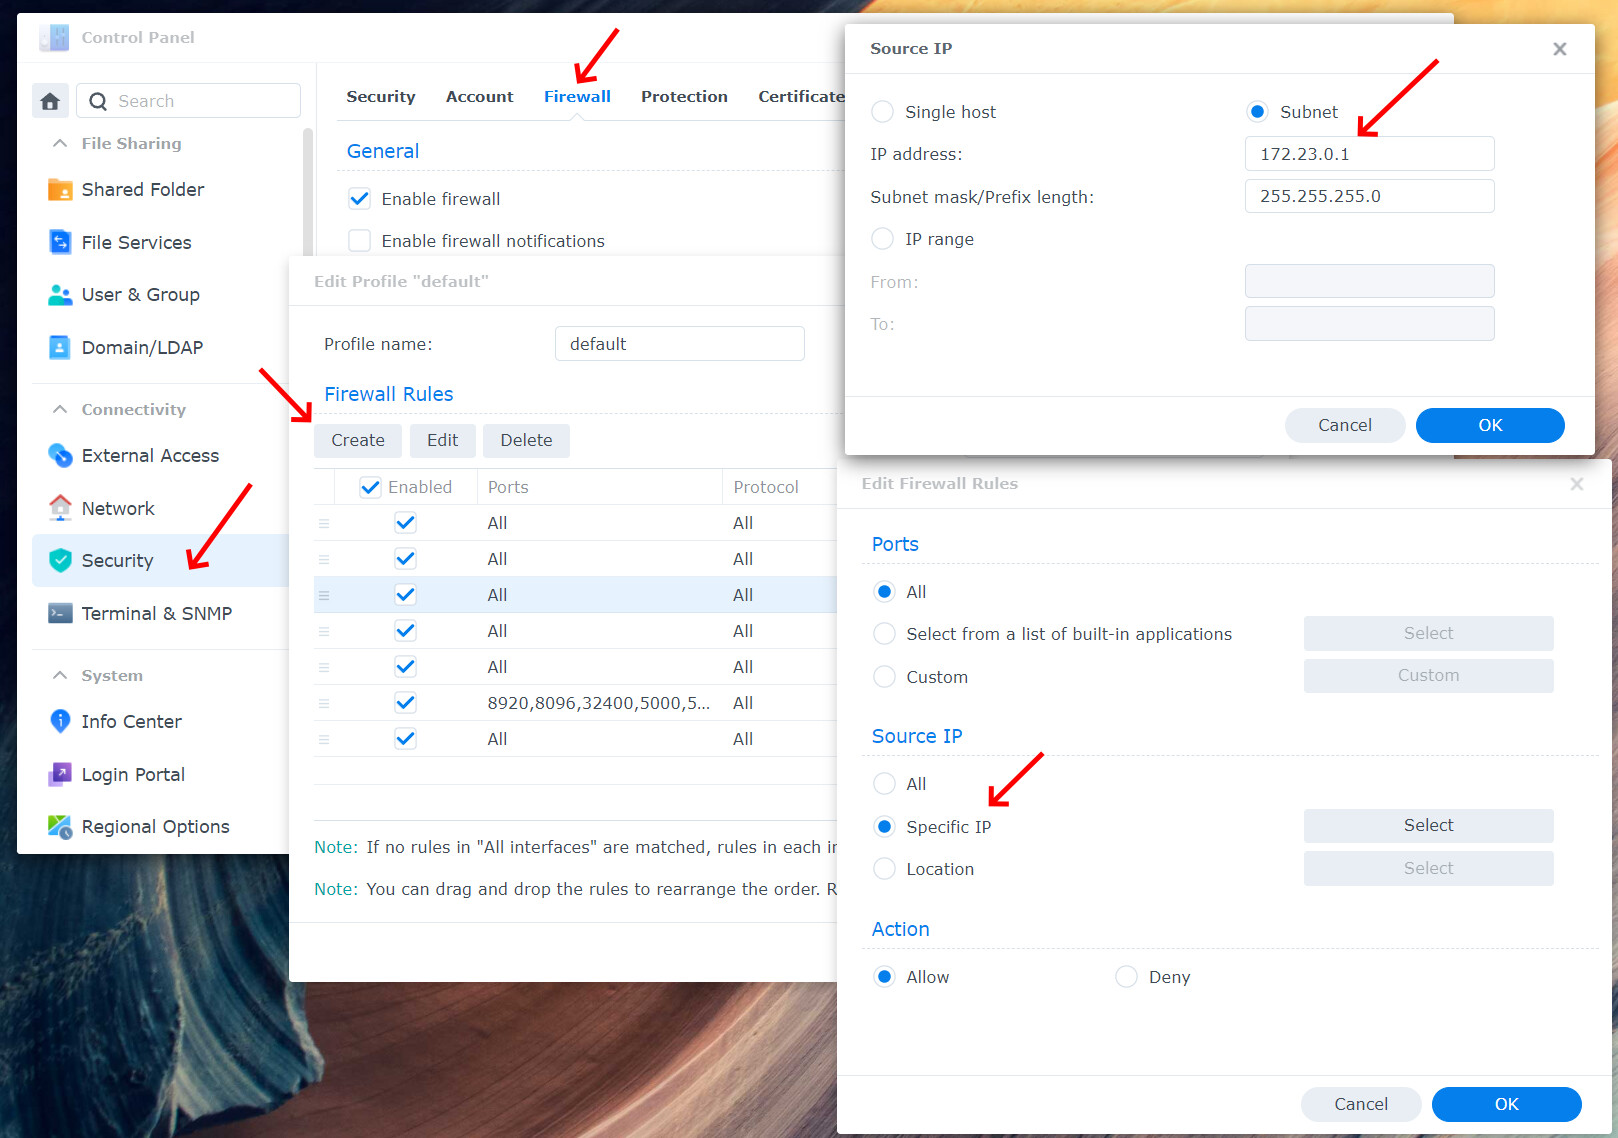
- Adjust firewall
Open the new container “nextcloud-aio-mastercontainer” in the container manager and check what IP address range was assigned to the new container.
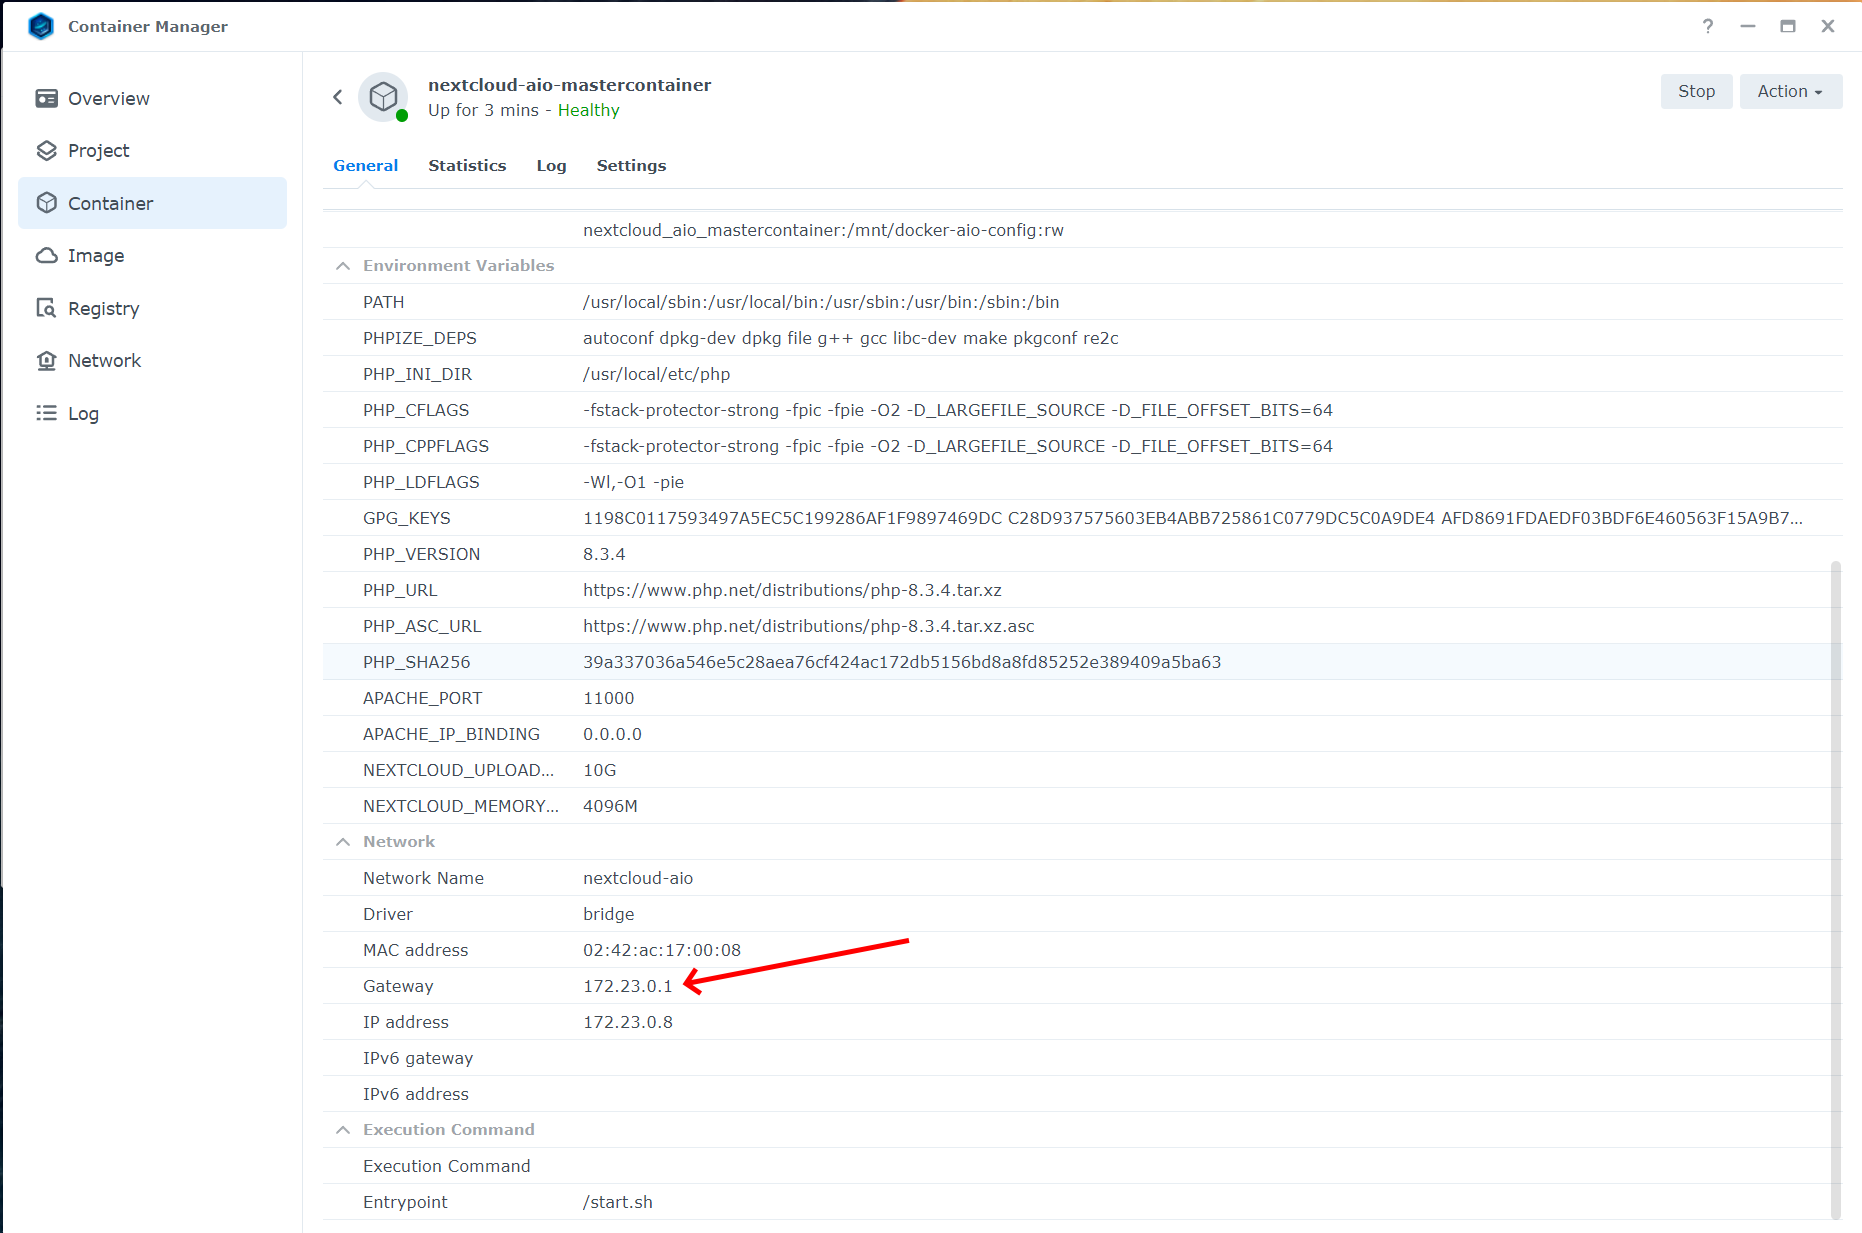
Go to security and open your firewall settings. Add a new allow rule. For the specific IP, use the IP address range from new container “nextcloud-aio-mastercontainer”. Make sure the new rule is at the top!
Enter the IP of your NAS with port 8080 and follow the setup.