You have decided to set up Nextcloud snap as a safe home for your data, that’s great! Thanks for supporting Nextcloud snap. ![]()
Nextcloud snap is a community driven installation method and is designed to be easy to install and simple to maintain. The ideal Nextcloud snap is an “install and forget” Nextcloud instance that works on most architectures and updates itself without needing administrative skills. Combining Nextcloud with Snapd makes it a perfect fit for IoT or scalable environments. Snapd is a secure and robust technology which the Nextcloud snap team has embraced. Most importantly snaps are designed to be secure, sandboxed, containerized applications isolated from the underlying system and from other applications.
However, the snap is opinionated and the following recommended components are included.
- Nextcloud snap uses recommended Apache

- Nextcloud snap uses recommended MySQL

- Nextcloud snap uses recommended PHP

- Nextcloud snap uses recommended Redis

Before getting started be aware of what you expect from your Nextcloud instance and what system resources are required. There are various aspects you might consider;
- number of users
- storage & space requirements
- power consumption & efficiency
- network & connectivity
- backup & redundancy
- etc. …
Plan your setup. Do some research, read the docs and the wiki.
Hardware
Whether you plan to run Nextcloud snap on a bare-metal server, a virtual server, a virtual machine, in a container or on a desktop PC, a notebook PC, a mini PC or on a single board computer like Raspberry Pi, you’ll be up and running in no time.
The folks at Canonical have made it really easy to install Ubuntu on almost any hardware out there.
Operating system
Since snaps are Ubuntu-centric, its no surprise that Nextcloud snap was designed to run perfectly on Ubuntu.
- Ubuntu Server for most hardware
- Ubuntu IoT for Raspberry Pi
Network
Assuming a network where the host running Nextcloud acquires a static local IPv4 address from DHCP/router and the required ports 80 and 443 are enabled and internet facing for that IPv4 address, the routers public IPv4 address must be available via DNS (Domain Name System) request.
- static local IPv4 address from DHCP/router
- internet facing Ports 80 and 443 for local IPv4 address
- DNS entry pointing to your public IPv4 address
NOTE
CG-NAT (Carrier Grade Network Address Translation) commonly known as DSLite (Dual Stack Lite) will not make a public IPv4 address available! See also detecting CG-NAT. There are workarounds however;
- Contact your service provider and request a public IPv4 address (comp. Full Dual Stack)
- Do some research about alternative IPv6 to IPv4 tunnels/routing
- Examples of tunnelbroker providers ROUTE64 or Cloudflare tunnel
Domain name and DNS
While some folks own a domain name like mydomain.com connected to their static IPv4 address and will probably have a subdomain pointing to the host like cloud.mydomain.com.
Self-hosting users will have a dynamic IPv4 address which could change under certain circumstances. These users require a DDNS provider (DynamicDNS provider) to keep track of their routers public IPv4 address for connecting a domain name like cloud.mydomain.mydnsprovider.xyz pointing to their routers (dynamic) public IPv4 address.
There are plenty DDNS providers out there to choose from. Some come at a fee, some are free, many offer domain names, others don’t. Often you will have a choice of domain names, sometimes you have to take what is available. Do some research and make the right choice for you.
Thus DNS (Domain Name System) resolves a “human readable domain name” to your public IPv4 address. That will be the domain name required by the client to reach your Nextcloud instance.
A DNS entry pointing to your public IPv4 address is a requirement for an SSL Certificate for HTTPS encryption.
Install Nextcloud snap
Type the following in your terminal:
sudo snap install nextcloud
By default the latest stable Nextcloud snap release will be installed and it will automatically update to subsequent stable releases, but there are other releases available as well and you have full control of automatic updates.
After installation, Nextcloud will start automatically. Assuming you and the device on which it was installed are on the same network, you will reach the Nextcloud installation by visiting <hostname>.local or the IP address of the instance in your browser. If your hostname is localhost or localhost.localdomain, like on an Ubuntu Core device, nextcloud.local will be used instead.
First start
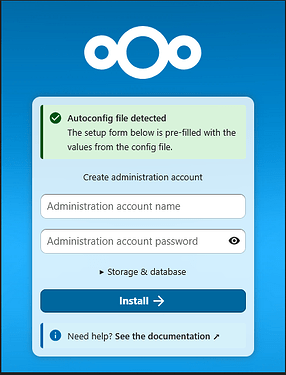
Upon visiting the Nextcloud installation for the first time, you will be prompted to enter an admin username and password before Nextcloud is initialised. This may take a while depending on resources and the device.
After you provide that information you will be logged in and able to install apps, create users, and upload files.
Further reading:
- How to configure Nextcloud snap
- How to manage Lets Encrypt for Nextcloud snap
- How to manage Nextcloud snap with snap
- How to use OCC management console for Nextcloud snap
- How to edit config.php for Nextcloud snap
- How to manage Nextcloud snap logs
- How to manage setup warnings in Nextcloud snap
- How to manage automatic updates in Nextcloud snap
- Nextcloud snap wiki & support

