To clarify the correct setup:
-
Ports 80 and 443
-
Forwarded from your router/firewall to the VM where Nginx Proxy Manager (NPM) is running.
-
NPM terminates SSL and manages your certificates.
-
NPM then forwards traffic to the Nextcloud AIO container on the internal port you defined (e.g. 11000).
-
Port 3478 (UDP)
-
This port is required by Nextcloud Talk High Performance Backend (STUN/TURN).
-
It must be forwarded directly from your router to the VM running Nextcloud AIO.
-
Do not send this through NPM, otherwise Talk won’t work correctly.
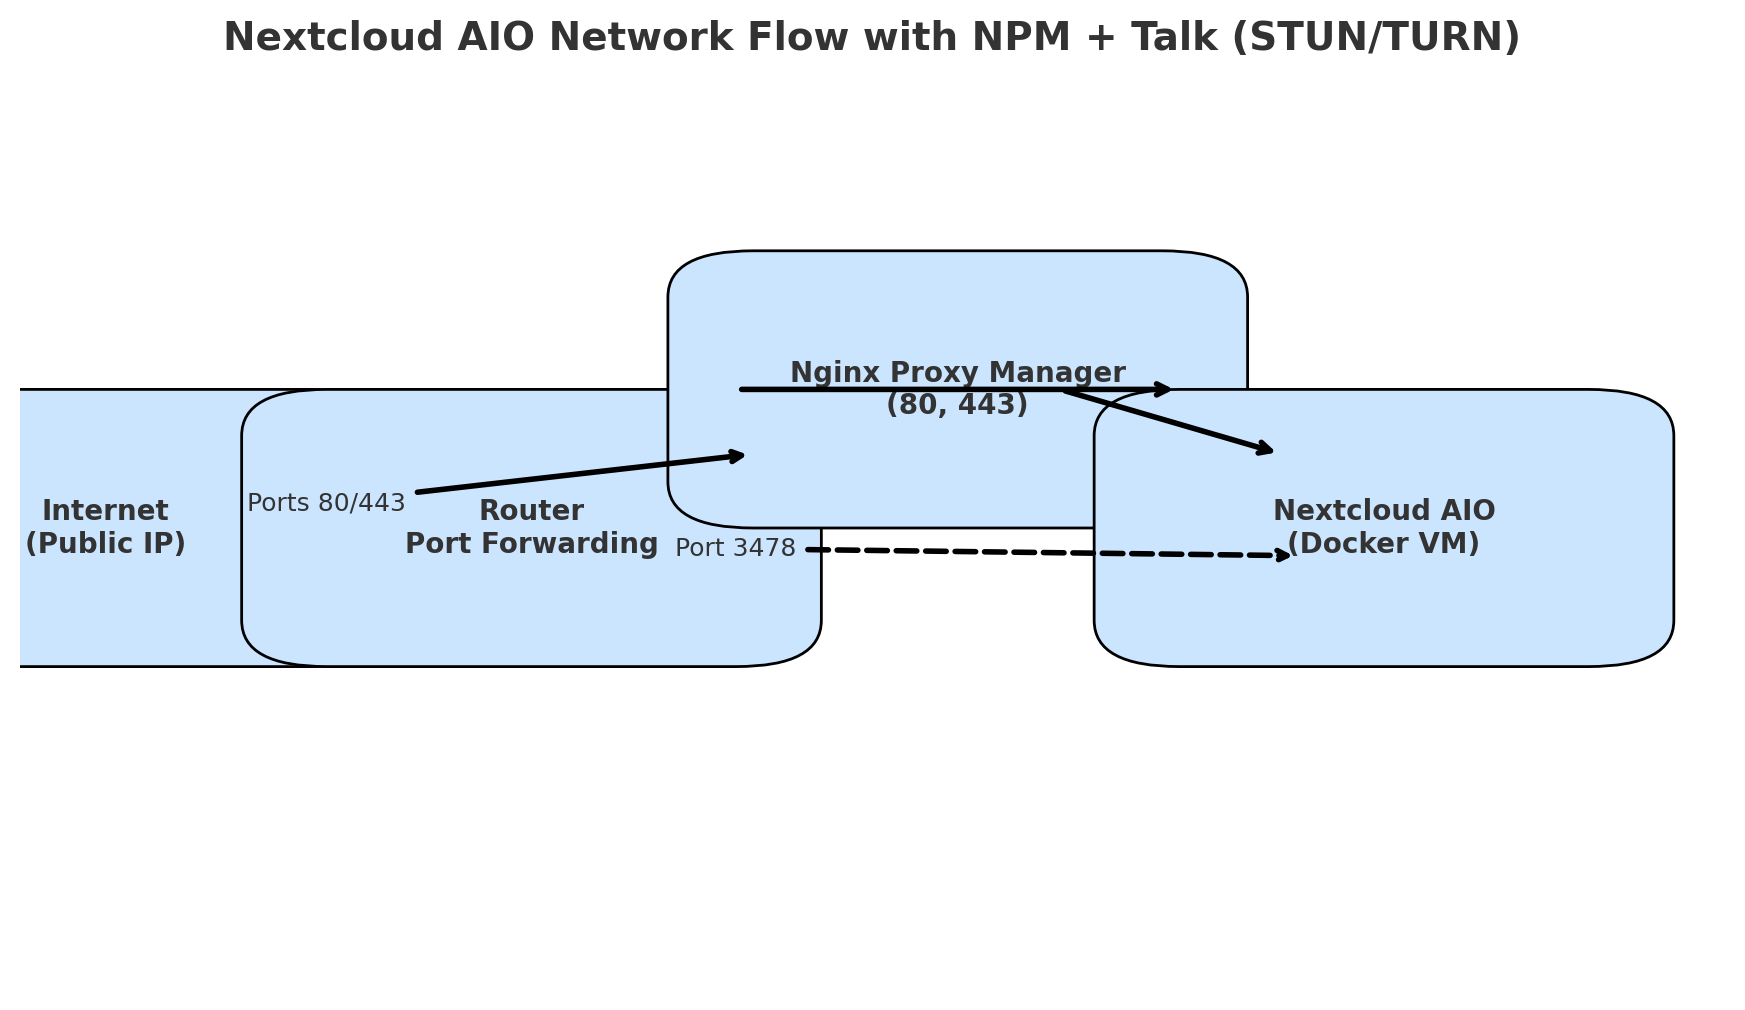
So the flow is:
Public IP → Router (80/443) → NPM → Nextcloud AIO
Public IP → Router (3478/UDP) → Nextcloud AIO
Install Nginx Proxy Manager with Docker Compose
1. Create a directory and go into it
mkdir -p ~/nginx-proxy-manager
cd ~/nginx-proxy-manager
2. Create the docker-compose.yml file
nano docker-compose.yml
Paste this content (replace the example passwords with your own secure values):
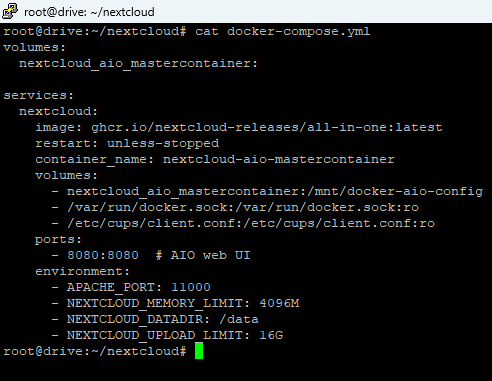
services:
  app:
    image: 'jc21/nginx-proxy-manager:latest'
    restart: unless-stopped
    ports:
      - '80:80'
      - '81:81'     # Web UI
      - '443:443'
    environment:
      PUID: 1000
      PGID: 1000
      DB_MYSQL_HOST: "db"
      DB_MYSQL_PORT: 3306
      DB_MYSQL_USER: "tony"
      DB_MYSQL_PASSWORD: "ChangeThisPassword123!"
      DB_MYSQL_NAME: "nginxpm"
    volumes:
      - ./data/app:/data
      - ./letsencrypt:/etc/letsencrypt

  db:
    image: 'jc21/mariadb-aria:latest'
    restart: unless-stopped
    environment:
      MYSQL_ROOT_PASSWORD: 'ChangeRootPassword123!'
      MYSQL_DATABASE: 'nginxpm'
      MYSQL_USER: 'tony'
      MYSQL_PASSWORD: 'ChangeThisPassword123!'
    volumes:
      - ./data/mysql:/var/lib/mysql
Save (CTRL+O, Enter) and exit (CTRL+X).
3. Start the stack
docker compose up -d
4. Access the Web UI
On first login you will be forced to set a new email and password.
 At this point, NPM is running and ready. You can now add your domain, request SSL certificates, and forward traffic to your Nextcloud AIO container.
Stop relying on basic translators — they mess things up and create confusion. Use an AI instead. It will give you much clearer results, and you’ll move forward much faster.
Also: most of the steps you are struggling with are already shown on YouTube. Learn by watching and repeating. That way you’ll understand how NGINX Proxy Manager works, and you’ll finally get the principle of domain and subdomain routing. It is easy to understand.
I already shared a working example for the Advanced tab in NPM for Nextcloud AIO (see my guide on large file synchronization, June update). Everything you need is there.
And one more thing: I told you before to learn Markdown for posting configs and logs here. You ignored it, but it makes a huge difference. It takes 10 minutes to learn, and everyone will read your posts much easier.
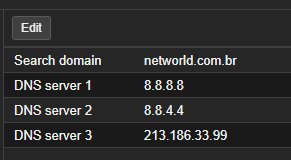
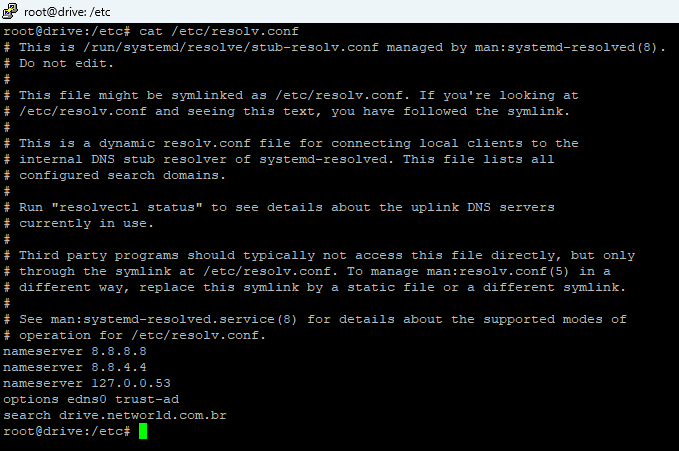
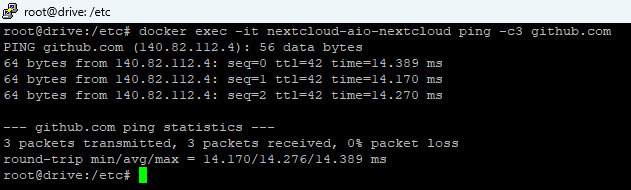
I already told you to check your LAN setup and the hardware/config inside your LAN. From my side, that’s about all I can help with right now.
At this point it requires more proactivity from your side. These are not complex tasks — they are all fairly simple once you take the time to actually go through them. You don’t need to be an IT pro to make this work, but you do need to sit down, learn the basics, and apply them.
You already have all the materials and configs you need. At this point it’s just about taking what’s here and dropping it into an AI tool — it will explain everything to you step by step in plain language.
There’s nothing fundamentally complex in what we’ve covered. You have the hardware, you have the configs, you have working examples. Now it’s on you to actually use them.