Hi everyone,
its been a while since I wrote a tutorial and I thought I would write one about my current setup, over the years Ive used several setups for Nextcloud, including rootless podman, NixOS setup and the standard install from the apt package manager.
My current setup is the AIO official Docker image → behind a Caddy reverse proxy (with Desec extension for the Let’s Encrypt cert) → Pihole for DNS → all behind a Wireguard VPN
Hopefully this tutorial will be useful for users struggling to get an AIO setup behind a Wireguard VPN (i.e technically local only, but remotely accessible via the VPN)
Note: This is mostly done from memory and a few notes as I have had this setup for almost a year now if you see something that doesn’t work or is glaringly wrong let me know and I will edit the guide.
Now lets started!!
first of all hopefully you have a server setup already with something like Debian or whatever your preference is.
Next I would setup your Wireguard VPN so that you can access the server remotely, this is out the scope of this guide as there are plenty of tutorials available online for setting up a self hosted Wireguard VPN. Like this one for example.
That being said I have 3 clients for my Wireguard VPN my spouse and I have the official wireguard clients on our android phones, that allow access to not only Nexcloud but my entire local network for example home assistant. Also of note I have my wireguard clients and server setup to use a preshared key as well as the private and public keys. Finally remember you will need to port forward - port 51820 to your server running Wireguard from your router for this all to work.
this is an example of my server config file
[interface]
Address = 10.100.0.1/24

ListenPort = 51820
PrivateKey = # add you private key or keyfile here
PostUp = iptables -A FORWARD -i wg0 -j ACCEPT; iptables -t nat -A POSTROUTING -s 10.100.0.0/24 -o eno1 -j MASQUERADE
PreDown = iptables -D FORWARD -i wg0 -j ACCEPT; iptables -t nat -D POSTROUTING -s 10.100.0.0/24 -o eno1 -j MASQUERADE
[Peer]
#peer1
PublicKey = # add your client public key or keyfile here
AllowedIPs = 10.100.0.2/32
PresharedKey = # add your client preshared key here

[Peer]
#peer2
PublicKey = # add your client public key or keyfile here
AllowedIPs = 10.100.0.3/32
PresharedKey =  # add your client preshared key here

[Peer]
#peer3
PublicKey = # add your client public key or keyfile here
AllowedIPs = 10.100.0.4/32
PresharedKey = # add your client preshared key here
and this a screenshot of my android client for reference

After you have tested that you VPN works as expected. Time to install docker and docker compose.
# Add Docker's official GPG key:
sudo apt-get update
sudo apt-get install ca-certificates curl
sudo install -m 0755 -d /etc/apt/keyrings
sudo curl -fsSL https://download.docker.com/linux/debian/gpg -o /etc/apt/keyrings/docker.asc
sudo chmod a+r /etc/apt/keyrings/docker.asc

# Add the repository to Apt sources:
echo \
  "deb [arch=$(dpkg --print-architecture) signed-by=/etc/apt/keyrings/docker.asc] https://download.docker.com/linux/debian \
  $(. /etc/os-release && echo "$VERSION_CODENAME") stable" | \
  sudo tee /etc/apt/sources.list.d/docker.list > /dev/null
sudo apt-get update

sudo apt-get install docker-ce docker-ce-cli containerd.io docker-buildx-plugin docker-compose-plugin
to test docker is working correctly run a test container
sudo docker run hello-world
now create several directories for each of you docker applications this is how I like to separate docker compose files, instead of one file where everything is updated at once this can lead to updating containers at a time when you don’t intend to. For example the Pi hole container which is used in this setup, you should pull the container update first, before restarting the container as you will lose internet access due to DNS being unavailable when the container is down.
mkdir pihole nextcloud caddy-container
now create your pihole container docker compose file
cd pihole
nano docker-compose.yml
and add
services:
  pihole:
    container_name: pihole
    image: pihole/pihole:latest
    ports:
      - "53:53/tcp"
      - "53:53/udp"
      - "67:67/udp"
      - "4080:80/tcp"
      - "4443:443/tcp"
    environment:
      TZ: '#your timezone'
      FTLCONF_webserver_api_password: '#somepasword'
      FTLCONF_dns_listeningMode: all
    volumes:
      - './etc-pihole:/etc/pihole'
    cap_add:
      - NET_ADMIN
    restart: unless-stopped
then start the container
sudo docker compose up -d
after a little time you should be able to access the fronend froma browser with the IP address of the server like so http://yourIP:4080/admin/login
setting up your pihole, to how you would like it is out of the scope of this tutorial, but I will show you how to get local DNS settings setup for use with Nextcloud.
in Pihole DNS settings you will add your router’s IP as the DNS source for pihole and deselect all the others
like so
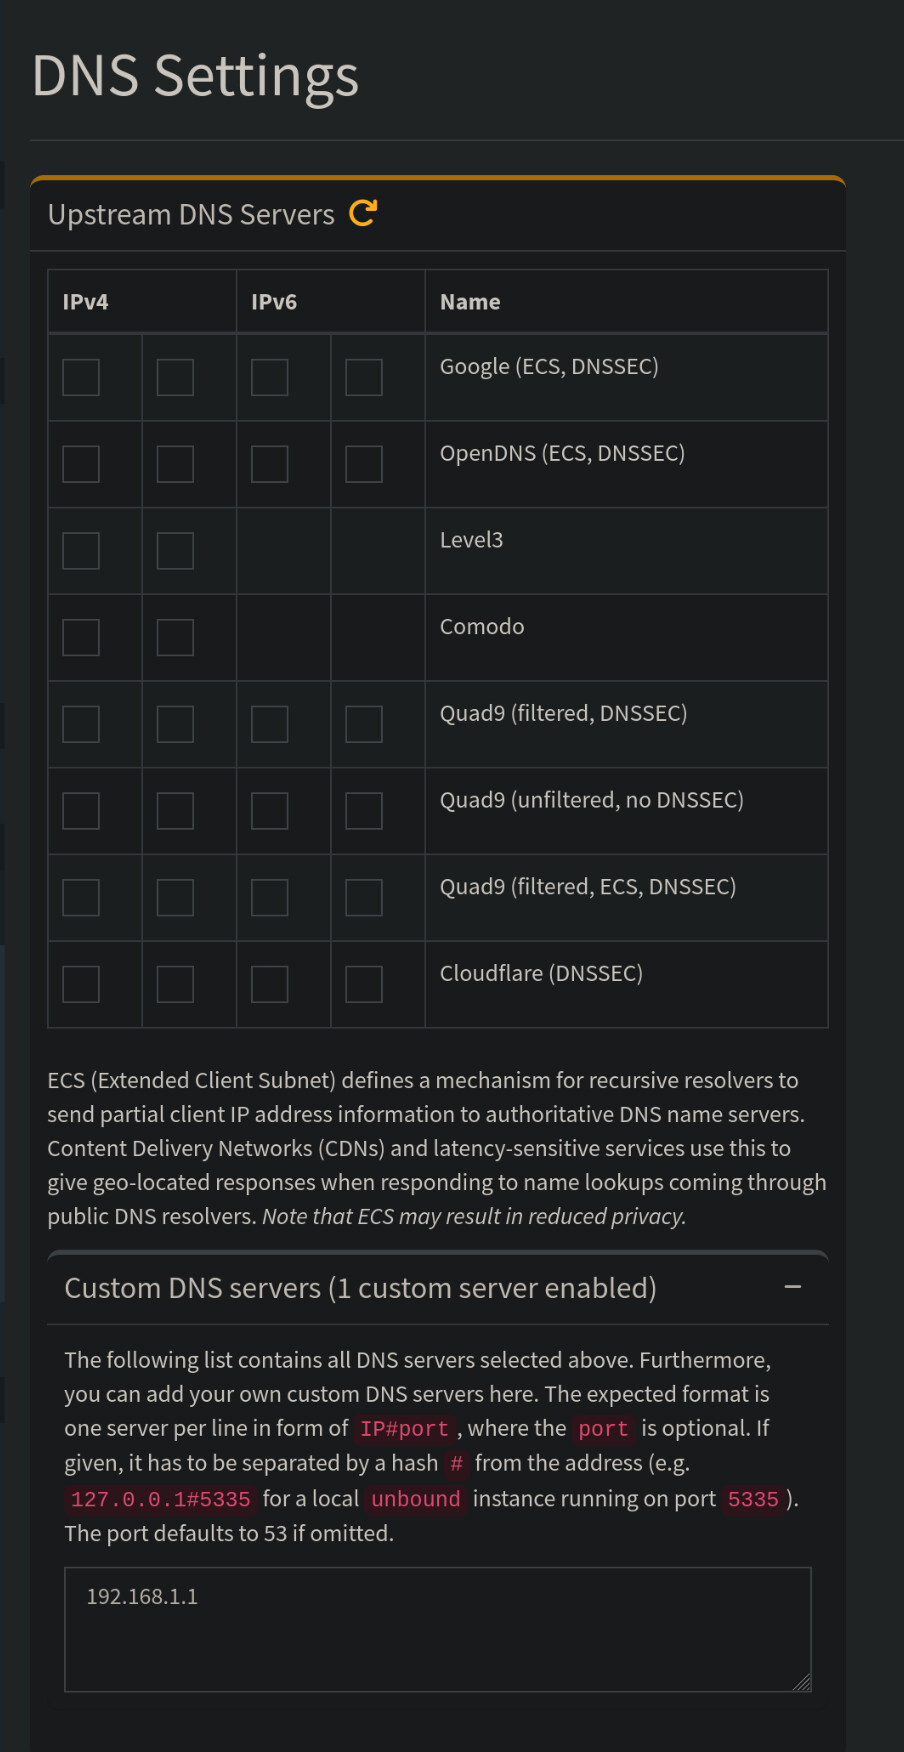
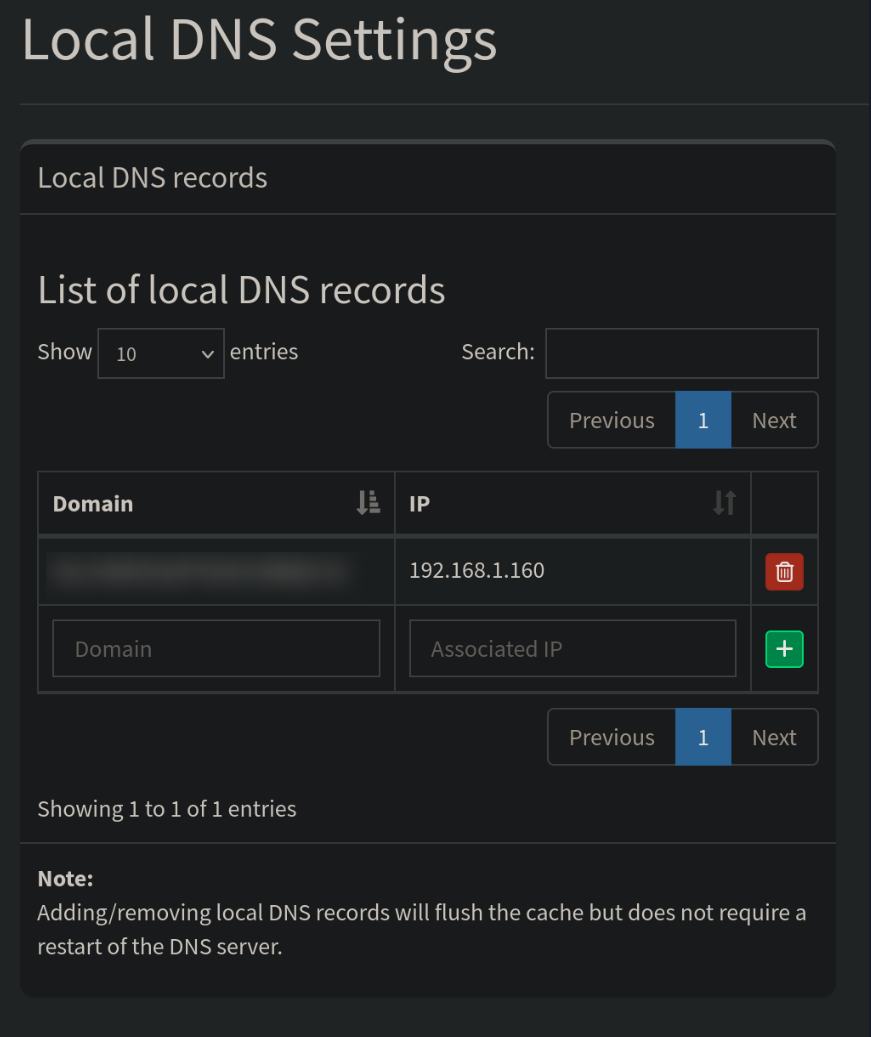
then in the local DNS settings of pihole you will add you desec domain name ( more on that in a bit) and the IP address of you Debian server that pihole is running on like so.
Note: in my setup, my router uses mullvad DNS for its DNS enquires but it will advertise the Pihole IP to all connected clients (like phones, laptops etc) to use as their DNS source
Next you will need to build you caddy reverse proxy with the Desec extension this is for acquiring a Let’s encrypt certificate, which AIO requires even for a local only setup.
Desec.io is a free and opensource DNS hosting service that can provide you with a free domain name, consider donating to keep the project alive. You could of course use Duckdns, but you will need to build a caddy container with the Duckdns extension instead of Desec.
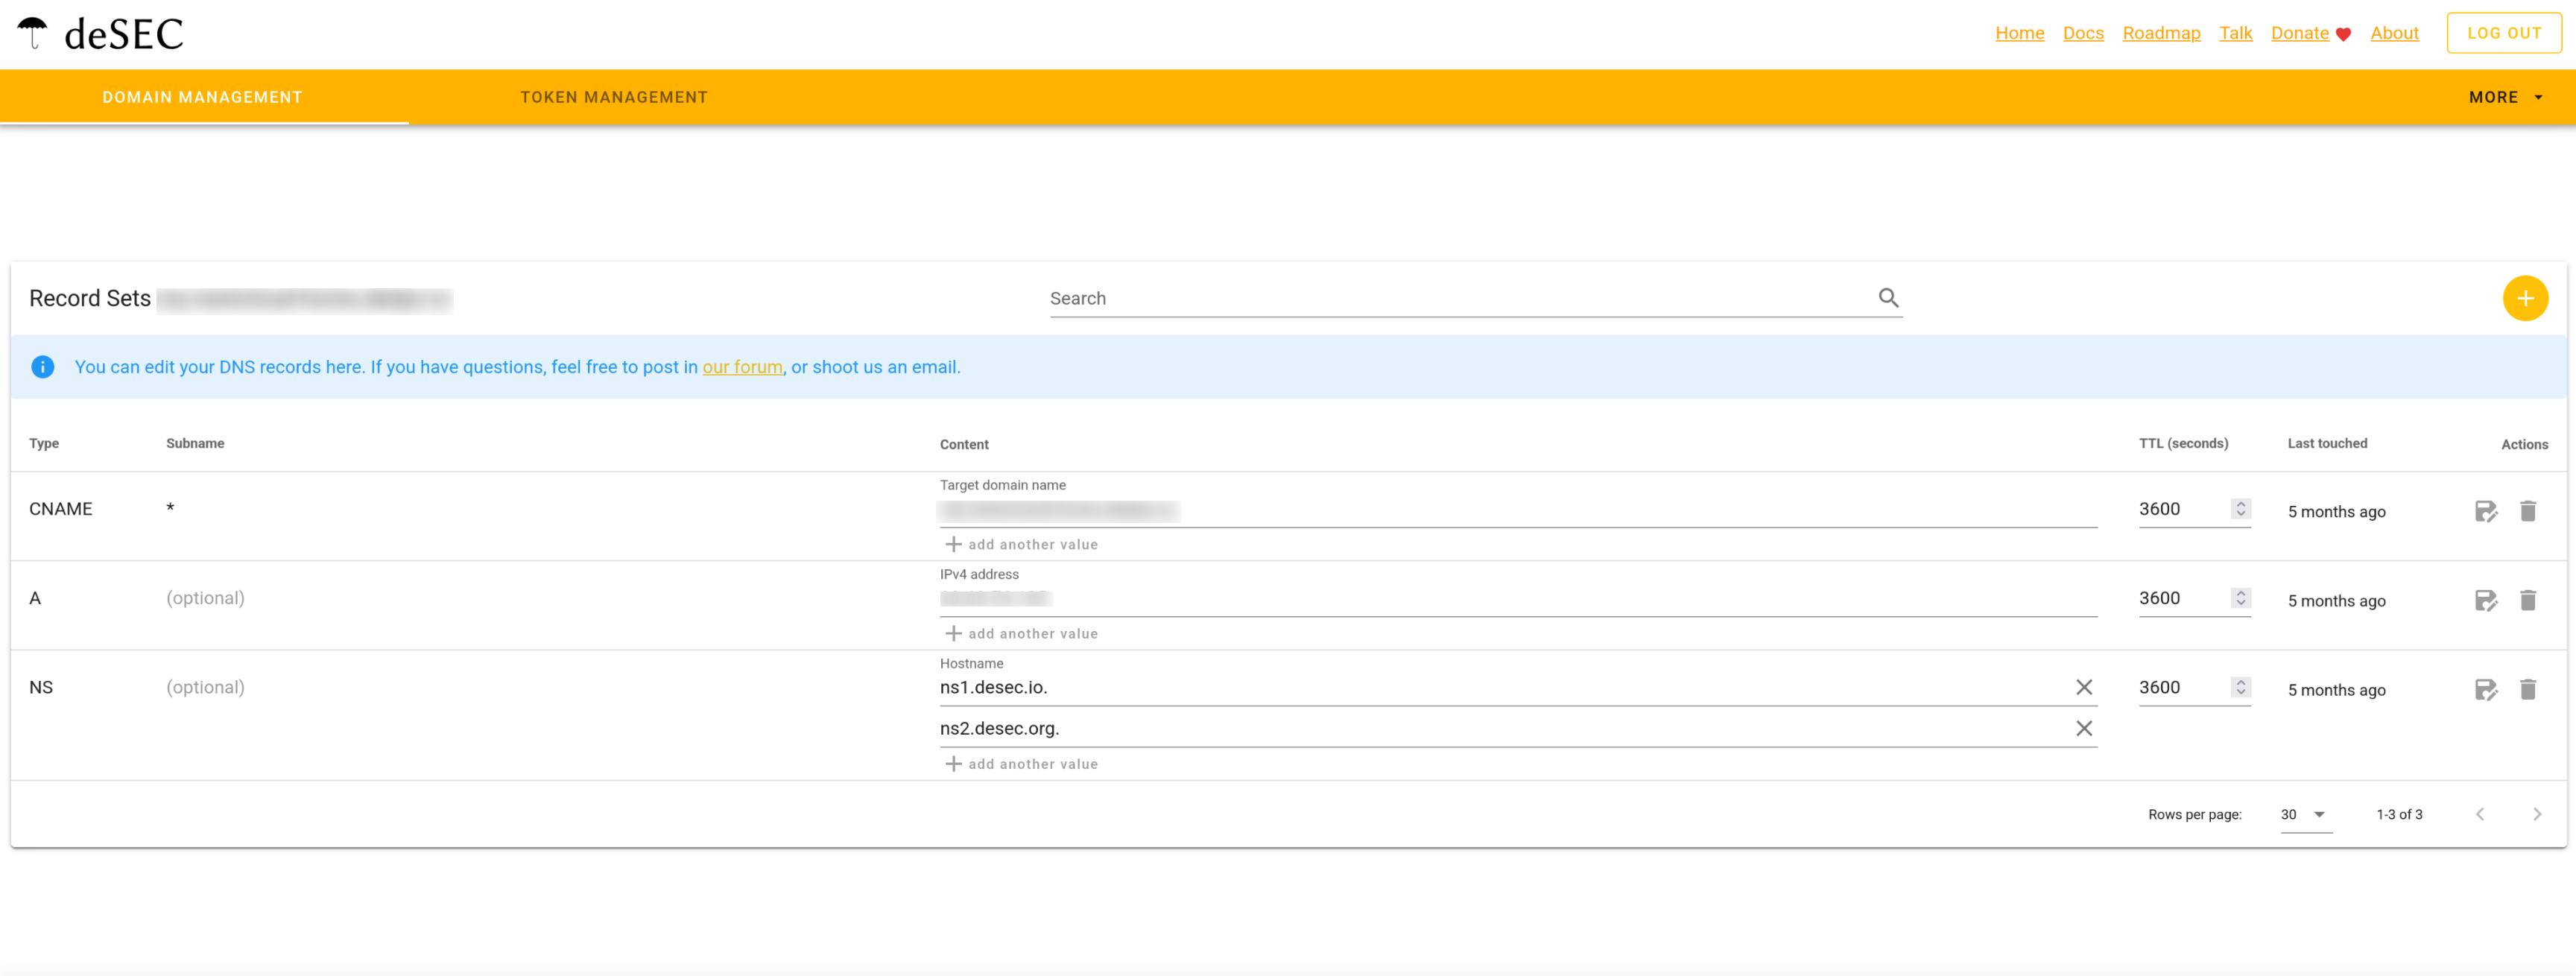
to setup up Desec create an account → login and create a domain name like my-nextcloud.dedyn.io then add an A record with your internet facing (external IP ) IP address for your home network use whatismyip.com or similar if you don’t know this.
Note: for my setup I have a fixed IP address, I have not tested this with dynamic DNS but it should work with using duckdns which can handle wildcard domain names and a dynamic IP.
then add a CNAME record with the subname of * and the target being your domain name you chose earlier ( please note the domain name you choose needs a . at the end otherwise Desec will complain so for example my-nextcloud.dedyn.io. ← (notice the dot)
this should look this
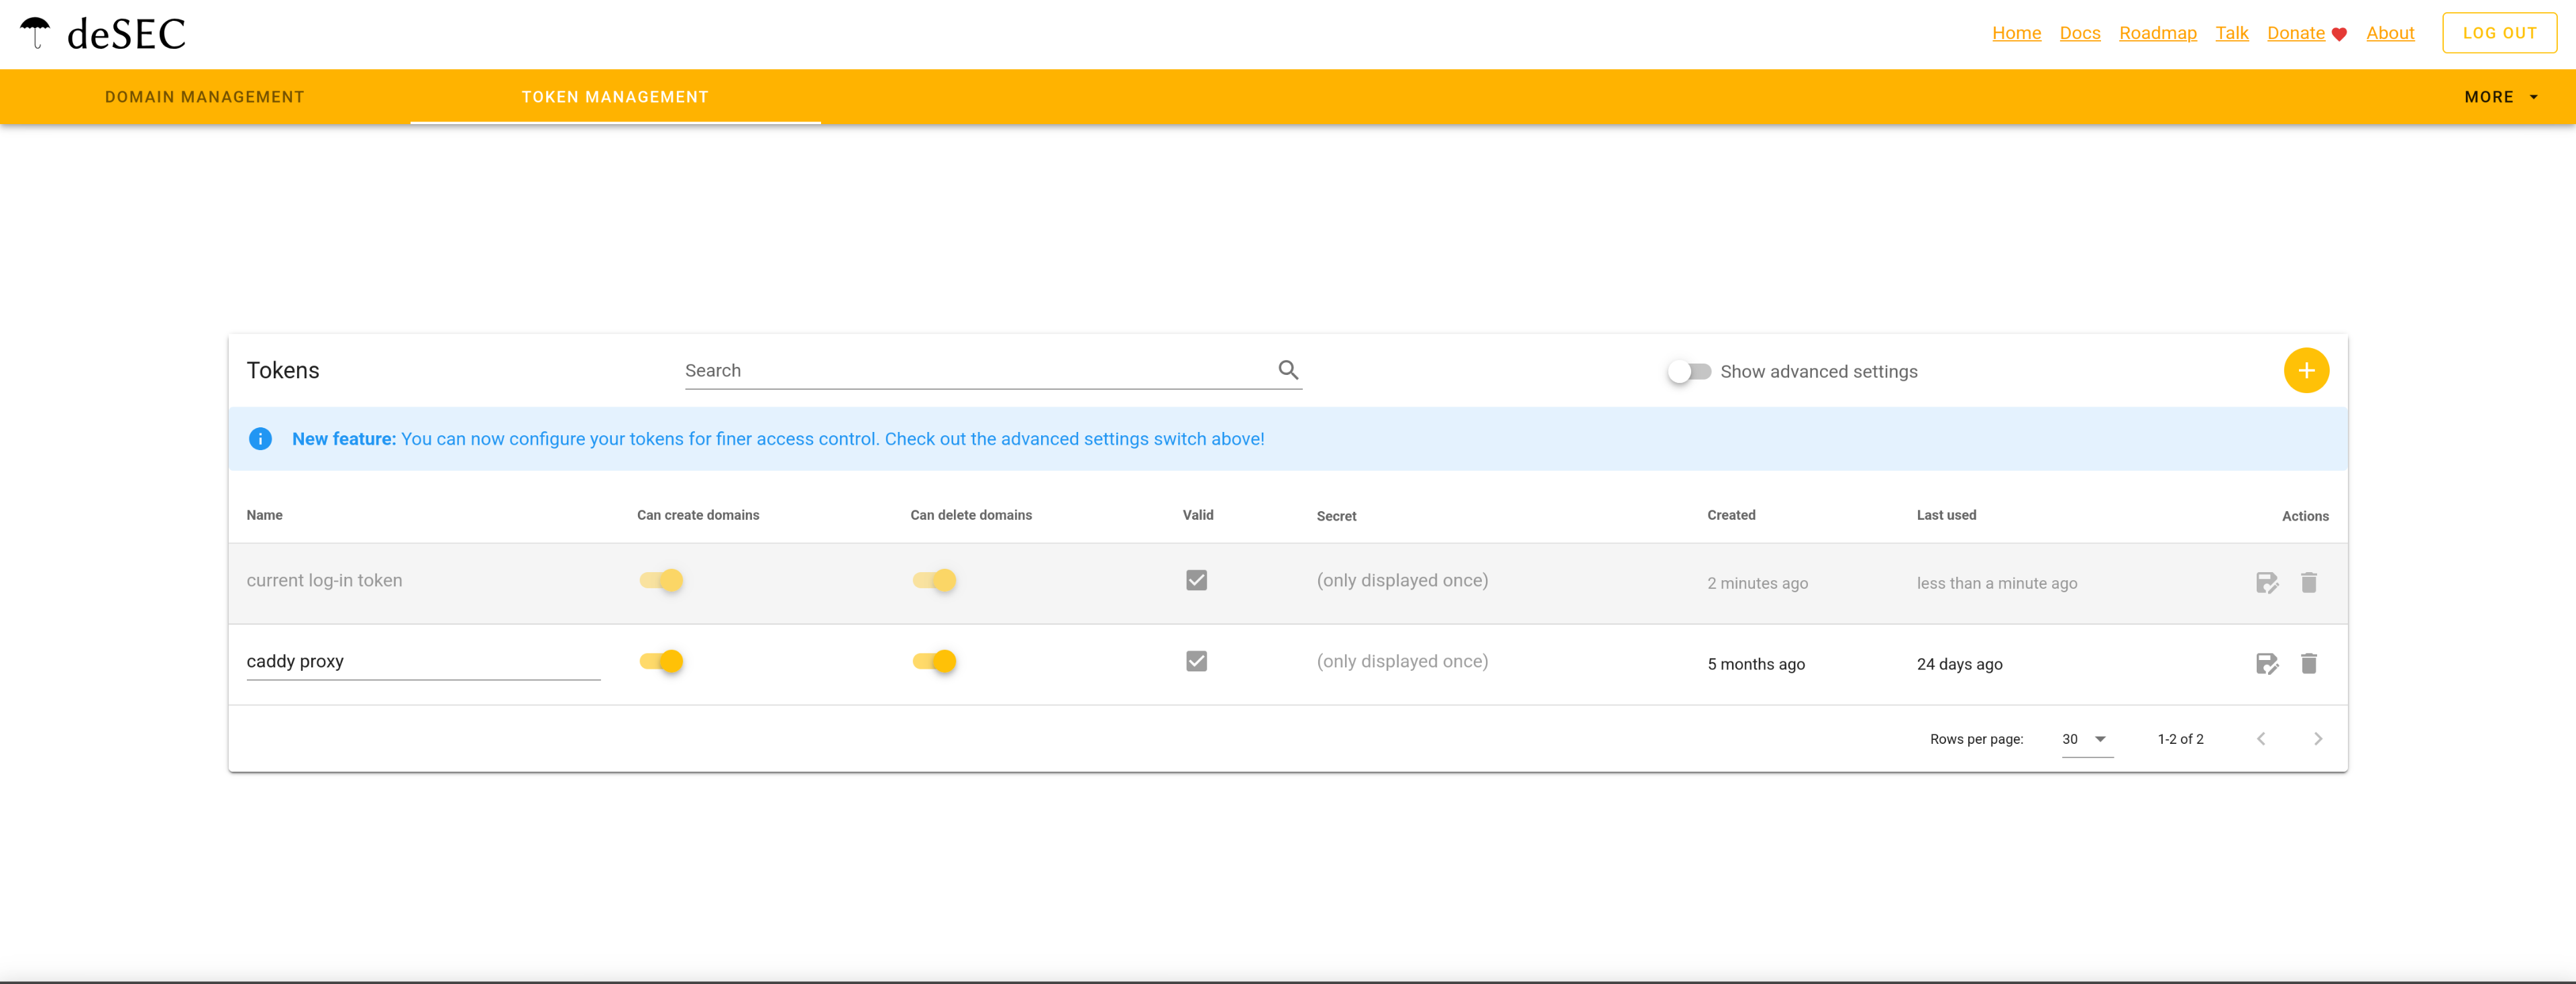
then create a token for use with you caddy container in the token management tab
like so. Call it caddy-proxy or whatever you want, but remember to copy the token for use in your Caddyfile ! this token will only be shown once!
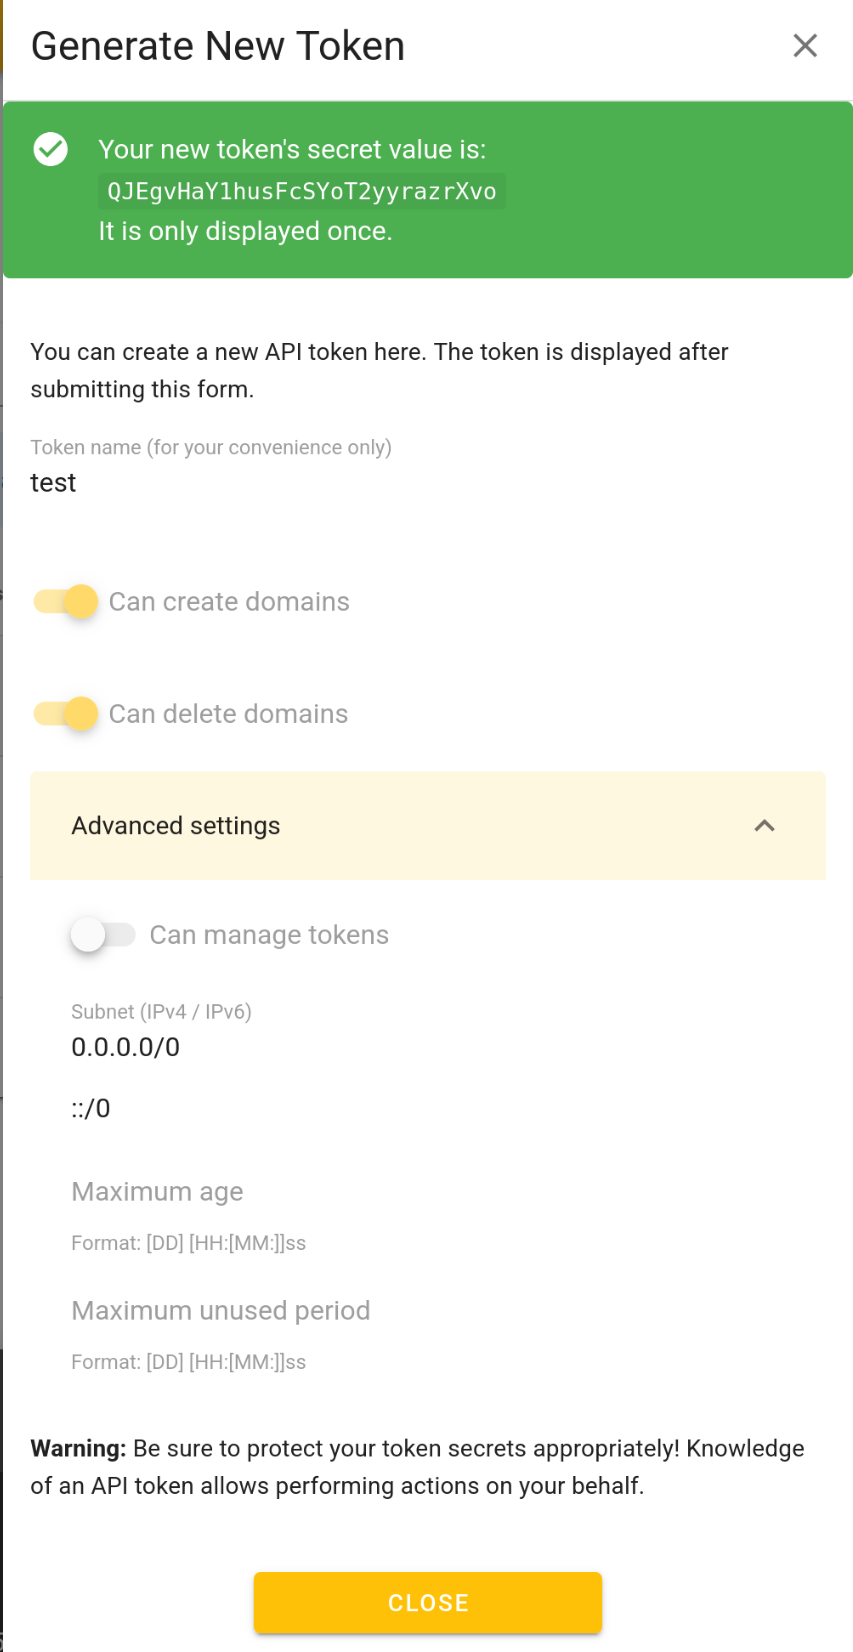
this should look like this in the end
Now for the caddy container
cd caddy-container
nano Dockerfile
in the docker file add
FROM caddy:builder AS builder

RUN xcaddy build \
    --with github.com/caddy-dns/desec

# building an auto updating image requires latest, so we ignore that warning
# hadolint ignore=DL3007
FROM caddy:latest

COPY --from=builder /usr/bin/caddy /usr/bin/caddy
then build the container
sudo docker build -t caddy-desec . (please note the . at the end , this is required to build)
Note: when you update the caddy container it will not be updated with the docker compose file in the Nextcloud directory, it will need to be rebuilt each time there is an update to the caddy docker image, however this is not updated to often and rebuilding doesn’t take long.
finally we are at the Nextcloud AIO container.
cd nextcloud
nano docker-compose.yml
add this to the docker compose
services:
  caddy:
    image: caddy-desec
    restart: unless-stopped
    container_name: caddy
    volumes:
      - ./Caddyfile:/etc/caddy/Caddyfile
      - ./certs:/certs
      - ./config:/config
      - ./data:/data
      - ./sites:/srv
    network_mode: "host"

  nextcloud:
    image: nextcloud/all-in-one:latest
    restart: unless-stopped
    container_name: nextcloud-aio-mastercontainer
    ports:
      - "8080:8080"
    environment:
      - APACHE_PORT=11000
      - SKIP_DOMAIN_VALIDATION=true  # This is required for this setup for local only
    volumes:
      - nextcloud_aio_mastercontainer:/mnt/docker-aio-config
      - /var/run/docker.sock:/var/run/docker.sock:ro
    depends_on:
      - caddy

volumes:
  nextcloud_aio_mastercontainer:
    name: nextcloud_aio_mastercontainer
now in the same directory create a Caddyfile for use with the previously built Caddy docker image
nano Caddyfile
and add this to the Caddyfile
https://my-nextcloud.dedyn.io:443 {       #add you domain name in place of my-nextcloud
        reverse_proxy localhost:11000
        tls {
                dns desec {
                        token "your Desec token you copied earlier"
                }
                propagation_timeout 300s   ##this is required or you will get certificate request errors
                propagation_delay 120s     ##this is required or you will get certificate request  errors
        }
}
once you have all that setup and I know its a lot so far, start the caddy container first, to get a Let’s Encrypt certificate and narrow down any errors that may occur, to just this container, watch the logs to see if its been successful. ( this is still from inside the Nextcloud directory)
sudo docker compose up caddy
press Ctrl + c when caddy has successfully received a certificate.
then you can start both containers together.
sudo docker compose up -d
and watch the logs to see when its ready
sudo docker compose logs -f
after a while you should be able to visit
https://192.168.1.160:8080/setup
to start setting up nextcloud
copy the passphase and store somewhere safe , add you new domain name where required, select a timezone and then start the containers, plus any extra ones you want like collabora or nextcloud talk ( which by the way works flawlessly for video calls and chat over the VPN)
now before I logged into Nextcloud via the domain for the first time ( not the local address your using now - which will become unavailable when all the containers have been started)
I set up my router as mentioned earlier to advertise the pihole IP for DNS , this is so all local clients can resolve my-nextcloud.dedyn.io which is obviously local only otherwise it will try and find the address on the web, which obviously doesn’t exist. Depending on your router you will need to search how to do this. For all users using Openwrt this is what I did
login to openwrt ->interfaces -> LAN -> edit -> DHCP Server -> advanced settings -> DHCP-options ->6,192.168.1.160 # please notice the 6, this is required.
check the administration section in Nextcloud for errors, create the users you want to access nextcloud and voila!
congrats ![]()
![]() you have Nextcloud AIO setup , now is the time to setup clients on your phone/laptops and test the functionality of talk and any other Nextcloud apps through the VPN. Remember to use the domain name as the address in all the clients not the local IP address.
you have Nextcloud AIO setup , now is the time to setup clients on your phone/laptops and test the functionality of talk and any other Nextcloud apps through the VPN. Remember to use the domain name as the address in all the clients not the local IP address.
Time for some final notes to wrap this all up.
To fix, for example the phone region error in the admin section of Nextcloud, you can use this command in the terminal of your server and adapt it based on what the error is your trying to fix
sudo docker exec --user www-data -it nextcloud-aio-nextcloud php occ config:system:set default_phone_region --value=“US”
when updating Nextcloud AIO and associated containers this is the process I follow.
access the AIO interface via the administration section of Nextcloud.
Then make a backup !!! (this is very important do not skip)
Shutdown the containers in the interface and return to the terminal of you server. I update the AIO container via the Docker compose file like this
sudo docker compose pull nextcloud
sudo docker compose down  (I find this cleaner to take the containers down)
sudo docker compose up -d
I then delete all the containers associated with Nextcloud from Portainer, but you could do this via the command line. This has prevented issues I have received updating in the past.
From the local AIO interface https://192.168.1.160:8080 update all containers ( which will pull fresh images and create new conatiners) and then after all the containers are back up and running, access Nextcloud via the domain name again as local IP will be locked out again.
finally the last issue I have found is , if you use a VPN like Mullvad for browing the net, you will not be able to use or access Nextcloud , this is because Mullvad VPN will use its own DNS servers to resolve website names bypassing your pihole , so again as your Nextcloud is only local it wont be able to find it.
Hopefully this guide is useful for others to get started with this setup and will help bypass some of the pitfalls I came across.
any advice at all for amending this guide to help improve mine an others setup will always be gratefully received.
until next time, enjoy the tutorial…