
This guide will help you access NextcloudPi.
Access
Instant Domain Name Access
When up and running, your device should become accessible at https://nextcloudpi or https://nextcloudpi.local.
First time access will be redirected automatically to the activation page
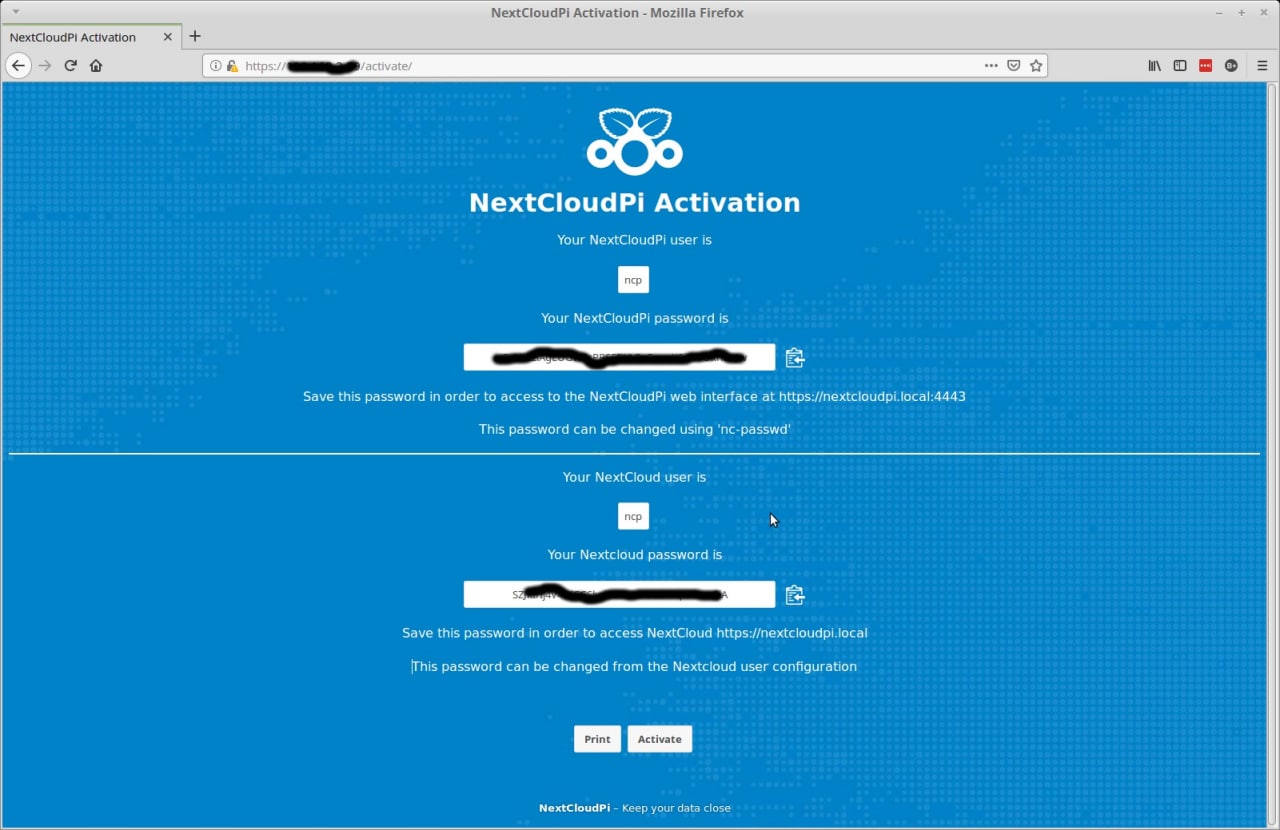
Copy the passwords for later use, you will be able to review or reset them with nc-admin (for NC) and nc-passwd (forNCP) from either Web UI or Terminal UI.

If you are using Windows you may have to install Bonjour Services for Windows to make it discover the .local domains. If your Browser redirects you to some search engine, you may try pasting the whole adress (including https://) at once.
If this does not work, try the following to discover your Pi’s IP address directly.
Find the IP address of the Raspberry Pi
You need to find the local IP address of the Raspberry Pi in order to connect to it and configure it.
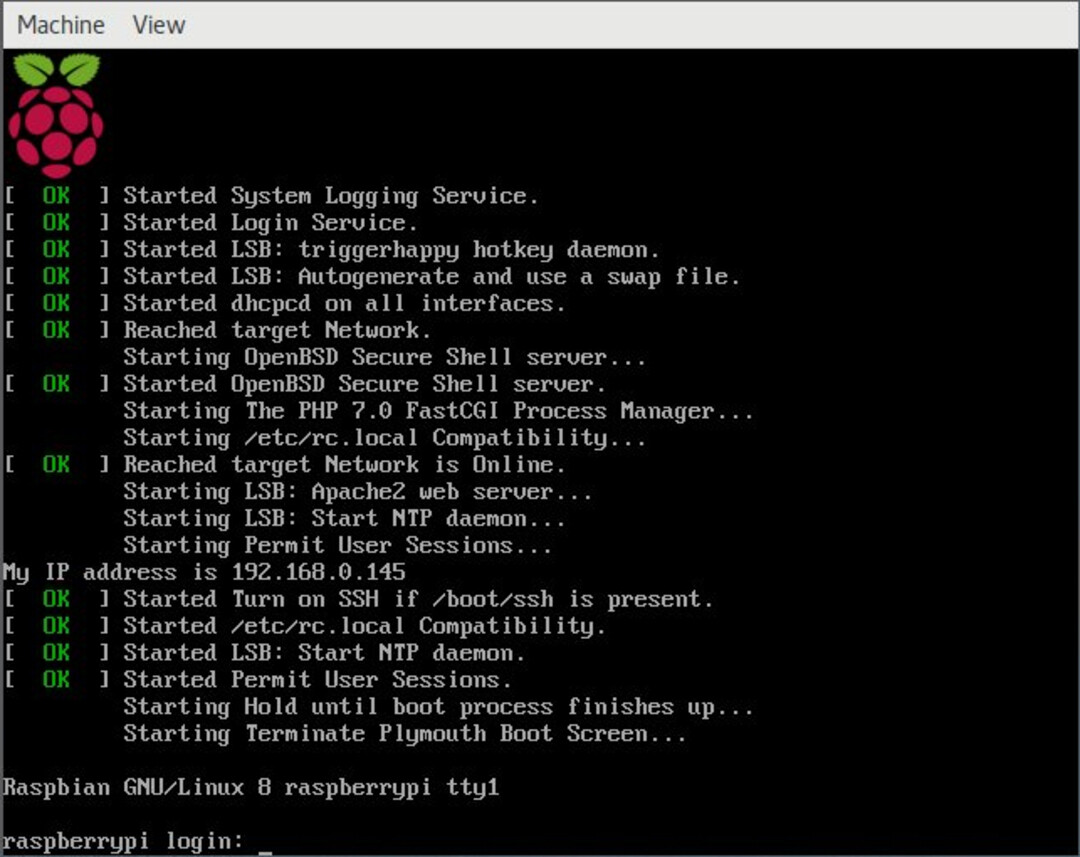
From the screen
If you connect a monitor with a HDMI cable to your Raspberry Pi, you will see the local IP address.
From your home Router Web Interface
Note: Routers do not share the same Web User Interface.
- Open a Web Browser, like Firefox.
- Visit your home Router IP address. It is written at the bottom of your Router. Normally it will be 192.168.1.1
- Log in with your credentials
- Navigate to an entry in your menu that shows your Network Map and find a list that shows the IPs of the connected devices. The Raspberry Pi’s IP address should be listed there.
Linux / Mac
- Install
nmapfrom your package manager. - Open a terminal
- Run the command
nmap -sP '192.168.0.*', where you have to replace the network IP (192.168.0) with yours.
You will see something like this:
Nmap scan report for 192.168.0.131 (192.168.0.131)
Host is up (0.016s latency).
MAC Address: AA:BB:CC:11:22:33 (Raspberry Pi Foundation)
The local IP address of this Raspberry Pi is 192.168.0.131
Windows
- Install
Angry IP Scannerfrom it’s website. - Run
Angry IP Scannerand put your network range and netmask. For exampleFrom: 192.168.0.0To: 192.168.0.255Netmask: /24. - Hit start.
You will get a list of all connected devices on your network. For more info look at the FAQ of Angry IP Scanner.
Activation
Now, we can start using NextcloudPi! first type the IP address or domain in your browser, then we have to activate NCP.
We will be presented with an activation page. Print the page or copy the passwords, and hit ‘Activate’. We can change these passwords later with nc-admin and nc-passwd.
We will be redirected to ncp-web where we can run the first run Wizard.
Initial setup finished
From this point
- we can access Nextcloud by the IP address, nextcloudpi.local or the DDNS domain name we have registered.
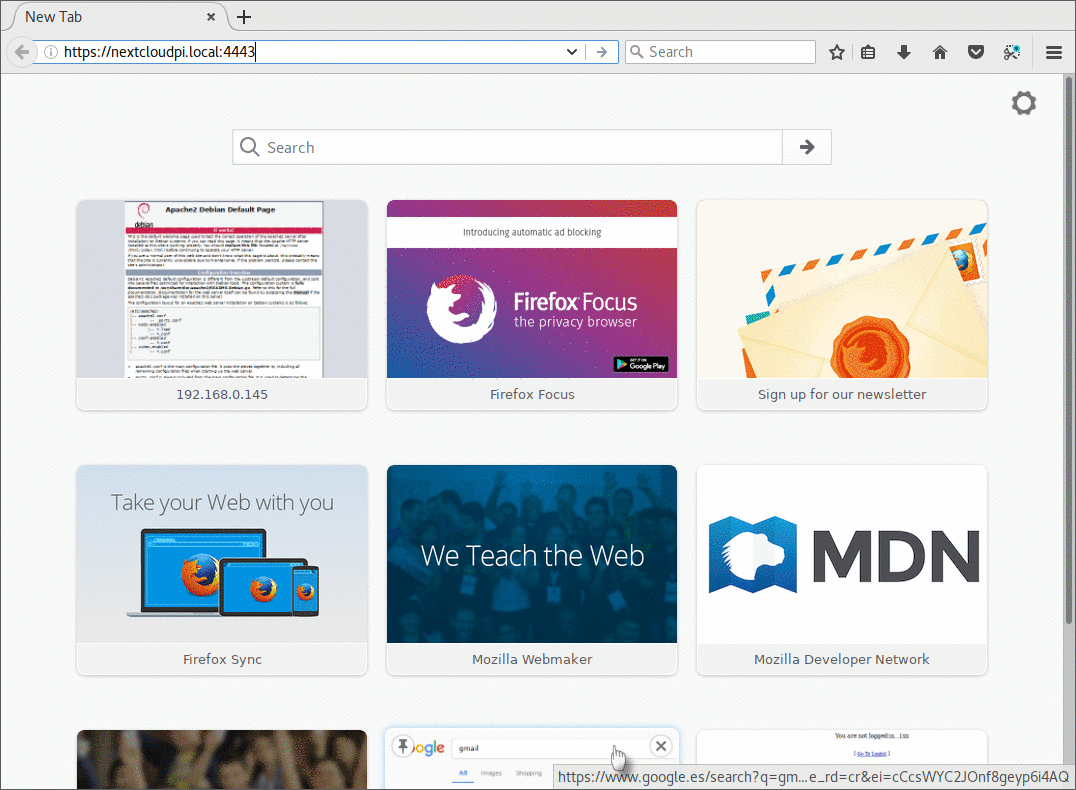
- we can access the NCP-web panel (WebUI) at port 4443, for example https://nextcloudpi.local:4443
You can continue to configure your NextcloudPi - read here
https://help.nextcloud.com/t/how-to-configure-nextcloudpi/126310
We hope this doc was helpful, if you encounter any issues please reach out to the community.
These docs are written by volunteers, please consider becoming one of them.
Contact the wiki team at Matrix or Telegram