Hallo zusammen
Ich habe mir zwei, drei Scripts für Backups der Cloud mit Cronjob geschrieben welche so weit auch funktionieren. Da ich aber nicht der oberguru bin und auch noch neu hier bin wäre ich froh wenn jemand mal drüber schaut und hier ev. auch ergänzt bevor sich andere auf das von mir geschriebene stürzen.
Und dann ev. das ganze mal in die Howto sektion verschieben könnten. Denn dort kann ich als neuling auch noch nichts reinstellten:
Wie ihr sehen könnt ist nicht alles von mir selbst geschrieben sondern meist nur angepasst
Unter /usr/local/bin habe ich folgende ausführbare Dateien erstellt:
backup_mysql.sh ausführbar gemacht und mit folgedem inhalt ergänzt:
#!/bin/sh

##############################################################################
# backup_mysql.sh
#
# by Nathan Rosenquist <nathan@rsnapshot.org>
# http://www.rsnapshot.org/
#
# This is a simple shell script to backup a MySQL database with rsnapshot.
#
# The assumption is that this will be invoked from rsnapshot. Also, since it
# will run unattended, the user that runs rsnapshot (probably root) should have
# a .my.cnf file in their home directory that contains the password for the
# MySQL root user. For example:
#
# /root/.my.cnf (chmod 0600)
#   [client]
#   user = root
#   password = thepassword
#   host = localhost
#
# This script simply needs to dump a file into the current working directory.
# rsnapshot handles everything else.
##############################################################################

# $Id: backup_mysql.sh,v 1.6 2007/03/22 02:50:21 drhyde Exp $

umask 0077

# backup the database
/usr/bin/mysqldump	--lock-tables	-p"euer passwort"	nextcloud	>	nextcloud_databases.sql

# make the backup readable only by root
/bin/chmod 600	nextcloud_databases.sql
Dieses Script erstellt ein Backup der Datenbank
Dann am gleichen Ort folgendes Script erstellt:
put_in_maintenance.sh ausführbar gemacht und mit folgedem inhalt ergänzt:
#!/bin/sh
cd /var/www/nextcloud/
sudo -u www-data php occ maintenance:mode --on
Das bringt die Nextcloud in den Maintenance mode
Dann am gleichen Ort folgendes Script erstellt:
put_off_maintenance.sh ausführbar gemacht und mit folgedem inhalt ergänzt:
#!/bin/sh
cd /var/www/nextcloud/
sudo -u www-data php occ maintenance:mode --off
Das nimmt die Nextcloud wieder aus dem Maintenance mode
Im selben Ordner hab ich dann noch einen Symbolischen link auf /var/www/nextcloud/occ gemacht
dann unter /etc/rsnapshot.conf mit folgendem Inhalt gefüttert:
#################################################
# rsnapshot.conf - rsnapshot configuration file #
#################################################
#                                               #
# PLEASE BE AWARE OF THE FOLLOWING RULES:       #
#                                               #
# This file requires tabs between elements      #
#                                               #
# Directories require a trailing slash:         #
#   right: /home/                               #
#   wrong: /home                                #
#                                               #
#################################################

#######################
# CONFIG FILE VERSION #
#######################

config_version	1.2

###########################
# SNAPSHOT ROOT DIRECTORY #
###########################

# All snapshots will be stored under this root directory.
#
snapshot_root	/mnt/backup/

# If no_create_root is enabled, rsnapshot will not automatically create the
# snapshot_root directory. This is particularly useful if you are backing
# up to removable media, such as a FireWire or USB drive.
#
no_create_root	1

#################################
# EXTERNAL PROGRAM DEPENDENCIES #
#################################

# LINUX USERS:   Be sure to uncomment "cmd_cp". This gives you extra features.
# EVERYONE ELSE: Leave "cmd_cp" commented out for compatibility.
#
# See the README file or the man page for more details.
#
cmd_cp		/bin/cp

# uncomment this to use the rm program instead of the built-in perl routine.
#
cmd_rm		/bin/rm

# rsync must be enabled for anything to work. This is the only command that
# must be enabled.
#
cmd_rsync	/usr/bin/rsync

# Uncomment this to enable remote ssh backups over rsync.
#
#cmd_ssh	/usr/bin/ssh

# Comment this out to disable syslog support.
#
cmd_logger	/usr/bin/logger

# Uncomment this to specify the path to "du" for disk usage checks.
# If you have an older version of "du", you may also want to check the
# "du_args" parameter below.
#
#cmd_du		/usr/bin/du

# Uncomment this to specify the path to rsnapshot-diff.
#
cmd_rsnapshot_diff	/usr/bin/rsnapshot-diff

# Specify the path to a script (and any optional arguments) to run right
# before rsnapshot syncs files
#
#cmd_preexec

# Specify the path to a script (and any optional arguments) to run right
# after rsnapshot syncs files
#
#cmd_postexec

# Paths to lvcreate, lvremove, mount and umount commands, for use with
# Linux LVMs.
#
#linux_lvm_cmd_lvcreate	/sbin/lvcreate
#linux_lvm_cmd_lvremove	/sbin/lvremove
#linux_lvm_cmd_mount	/bin/mount
#linux_lvm_cmd_umount	/bin/umount

#########################################
#           BACKUP INTERVALS            #
# Must be unique and in ascending order #
# i.e. hourly, daily, weekly, etc.      #
#########################################

#retain		hourly	6
retain		daily	7
retain		weekly	4
retain		monthly	3

############################################
#              GLOBAL OPTIONS              #
# All are optional, with sensible defaults #
############################################

# Verbose level, 1 through 5.
# 1     Quiet           Print fatal errors only
# 2     Default         Print errors and warnings only
# 3     Verbose         Show equivalent shell commands being executed
# 4     Extra Verbose   Show extra verbose information
# 5     Debug mode      Everything
#
verbose		2

# Same as "verbose" above, but controls the amount of data sent to the
# logfile, if one is being used. The default is 3.
#
loglevel	3

# If you enable this, data will be written to the file you specify. The
# amount of data written is controlled by the "loglevel" parameter.
#
logfile	/var/log/rsnapshot.log

# If enabled, rsnapshot will write a lockfile to prevent two instances
# from running simultaneously (and messing up the snapshot_root).
# If you enable this, make sure the lockfile directory is not world
# writable. Otherwise anyone can prevent the program from running.
#
lockfile	/var/run/rsnapshot.pid

# By default, rsnapshot check lockfile, check if PID is running
# and if not, consider lockfile as stale, then start
# Enabling this stop rsnapshot if PID in lockfile is not running
#
#stop_on_stale_lockfile		0

# Default rsync args. All rsync commands have at least these options set.
#
#rsync_short_args	-a
#rsync_long_args	--delete --numeric-ids --relative --delete-excluded

# ssh has no args passed by default, but you can specify some here.
#
#ssh_args	-p 22

# Default arguments for the "du" program (for disk space reporting).
# The GNU version of "du" is preferred. See the man page for more details.
# If your version of "du" doesn't support the -h flag, try -k flag instead.
#
#du_args	-csh

# If this is enabled, rsync won't span filesystem partitions within a
# backup point. This essentially passes the -x option to rsync.
# The default is 0 (off).
#
#one_fs		0

# The include and exclude parameters, if enabled, simply get passed directly
# to rsync. If you have multiple include/exclude patterns, put each one on a
# separate line. Please look up the --include and --exclude options in the
# rsync man page for more details on how to specify file name patterns.
#
#include	???
#include	???
#exclude	???
#exclude	???

# The include_file and exclude_file parameters, if enabled, simply get
# passed directly to rsync. Please look up the --include-from and
# --exclude-from options in the rsync man page for more details.
#
#include_file	/path/to/include/file
#exclude_file	/path/to/exclude/file

# If your version of rsync supports --link-dest, consider enable this.
# This is the best way to support special files (FIFOs, etc) cross-platform.
# The default is 0 (off).
#
#link_dest	0

# When sync_first is enabled, it changes the default behaviour of rsnapshot.
# Normally, when rsnapshot is called with its lowest interval
# (i.e.: "rsnapshot hourly"), it will sync files AND rotate the lowest
# intervals. With sync_first enabled, "rsnapshot sync" handles the file sync,
# and all interval calls simply rotate files. See the man page for more
# details. The default is 0 (off).
#
#sync_first	0

# If enabled, rsnapshot will move the oldest directory for each interval
# to [interval_name].delete, then it will remove the lockfile and delete
# that directory just before it exits. The default is 0 (off).
#
#use_lazy_deletes	0

# Number of rsync re-tries. If you experience any network problems or
# network card issues that tend to cause ssh to crap-out with
# "Corrupted MAC on input" errors, for example, set this to a non-zero
# value to have the rsync operation re-tried
#
#rsync_numtries 0

# LVM parameters. Used to backup with creating lvm snapshot before backup
# and removing it after. This should ensure consistency of data in some special
# cases
#
# LVM snapshot(s) size (lvcreate --size option).
#
#linux_lvm_snapshotsize	100M

# Name to be used when creating the LVM logical volume snapshot(s).
#
#linux_lvm_snapshotname	rsnapshot

# Path to the LVM Volume Groups.
#
#linux_lvm_vgpath	/dev

# Mount point to use to temporarily mount the snapshot(s).
#
#linux_lvm_mountpath	/path/to/mount/lvm/snapshot/during/backup

###############################
### BACKUP POINTS / SCRIPTS ###
###############################

# LOCALHOST
#backup	/home/		localhost/
#backup	/etc/		localhost/
#backup	/usr/local/	localhost/
#backup	/var/log/rsnapshot		localhost/
#backup	/etc/passwd	localhost/
#backup	/home/foo/My Documents/		localhost/
#backup	/foo/bar/	localhost/	one_fs=1, rsync_short_args=-urltvpog
#backup_script	/usr/local/bin/backup_pgsql.sh	localhost/postgres/
# You must set linux_lvm_* parameters below before using lvm snapshots
#backup	lvm://vg0/xen-home/	lvm-vg0/xen-home/

# EXAMPLE.COM
#backup_script	/bin/date "+ backup of example.com started at %c"	unused1
#backup	root@example.com:/home/	example.com/	+rsync_long_args=--bwlimit=16,exclude=core
#backup	root@example.com:/etc/	example.com/	exclude=mtab,exclude=core
#backup_script	ssh root@example.com "mysqldump -A > /var/db/dump/mysql.sql"	unused2
#backup	root@example.com:/var/db/dump/	example.com/
#backup_script	/bin/date	"+ backup of example.com ended at %c"	unused9

# CVS.SOURCEFORGE.NET
#backup_script	/usr/local/bin/backup_rsnapshot_cvsroot.sh	rsnapshot.cvs.sourceforge.net/

# RSYNC.SAMBA.ORG
#backup	rsync://rsync.samba.org/rsyncftp/	rsync.samba.org/rsyncftp/

# Nextcloud
cmd_preexec 	/usr/local/bin/put_in_maintenance.sh
backup_script	/usr/local/bin/backup_mysql.sh	mysql/mysql_dump
backup	                /var/www/nextcloud/config/	nextcloudConfig/
backup	                /home/nextcloud/nextclouddaten/	nextclouddaten/
cmd_postexec	/usr/local/bin/put_off_maintenance.sh
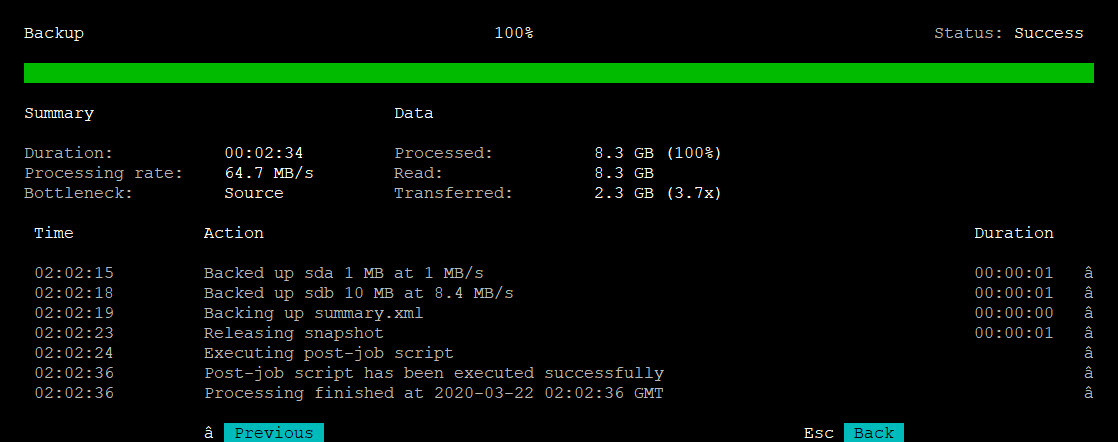
Bei mir werden die Backups unter /mnt/backup welches ein externes Nas ist gespeichert. Es werden die drei Scripts ausgeführt, die mysql-Datenbank, die Config, und die Daten der User gebackupt.
Das ganze wird bei mir Täglich gemacht und es wird 7 Tage aufbewahrt
1x Wöchentlich und jeweils 4 Wochen aufbewahrt
1x Monatlich und dabei 3 Monate aufbewahrt.
Dann habe ich noch unter /etc/cron.d eine Datei namens rsnapshot erstellt und mit folgendem Inhalt ergänzt:
# This is a sample cron file for rsnapshot.
# The values used correspond to the examples in /etc/rsnapshot.conf.
# There you can also set the backup points and many other things.
#
# To activate this cron file you have to uncomment the lines below.
# Feel free to adapt it to your needs.

# 0 */4		* * *		root	/usr/bin/rsnapshot hourly
 0  3  	* * *		root	/usr/bin/rsnapshot daily
 0  4  	* * 1		root	/usr/bin/rsnapshot weekly
 0  5  	1 * *		root	/usr/bin/rsnapshot monthly
Ich hoffe ein paar leuten ein bisschen damit weitergeholfen zu haben die auch so etwas machen wollen.
Zum wiederherstellen der Daten müsst ihr dann
rsync -Aax nextcloud-dirbkp/ nextcloud/
1x mit config files von eurem Backup und natürlich eurem Pfad
1x mit datenfiles von eurem Backup und natürlich eurem Pfad
mysql -h  -uroot -p[password] -e "DROP DATABASE nextcloud"
mysql -h  -uroot -p[password] -e "CREATE DATABASE nextcloud"
mysql -h -uroot -p[password] [db_name] < nextcloud-sqlbkp.bak
Das ganze löscht zuerst eure noch vorhandene alte Datenbank.
Dann macht ihr sie neu
Und dann kopiert Ihr eurer Backup in die neu erstellte Datenbank